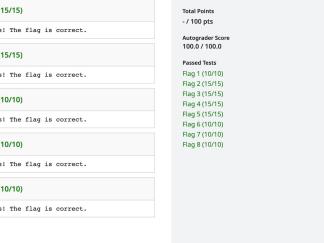
Learning Goals of this Project:
- Learning basic Pandas Dataframe manipulations
- Learning more about Machine Learning (ML) Classification models and how they are used in a Cybersecurity context.
- Learning about basic data pipelines and transformations.
- Learning how to write and use unit tests when developing Python code.
Important Highlights
- You can do this project on your host, you do not need to use the VM.
- Please see the Setup page for videos and instructions about project setup.
- Keep the VM around for the final project (Summer 24), Web Security.
- Please watch the provided videos below to see how to setup your environment, we can’t provide broad support here
- There are only 25 submissions allowed! This is because Gradescope is a limited resource. It’s improper to test your code against Gradescope.
- We have provided a local testing suite, be sure to pass that completely before you submit to Gradescope.
Important Reference Materials:
Project Overview Video
This is a 16 minute video by the project creator, it covers project concepts.
There are other videos on the Setup page that cover installation and other subjects.
BACKGROUND
Many of the Projects in CS6035 are focused on offensive security tasks. These are related to Red Team activities/tasks that many of us may associate with cybersecurity. This project will be focused on defensive security tasks, which are usually considered Blue Team activities that are done by many corporate teams.
Historically, many defensive security professionals have investigated malicious activity, files, and code. They investigate these to create patterns (often called signatures) that can be used to detect (and prevent) malicious activity, files, and code when that pattern is used again. What this means is that these simple methods only were effective on known threats.
This approach was relatively effective in preventing known malware from infecting systems, but it did nothing to protect against novel attacks. As attackers became more sophisticated, they learned to tweak or simply encode their malicious activity, files, or code to avoid detection from these simple pattern matching detections.
With this background information, it would be nice if a more general solution could give a score to activity, files, and code that pass through corporate systems every day. This solution would inform the security team that while a certain pattern may not exactly fit a signature of known malicious activity, files, or code it appears to be very similar to examples that were seen in the past that were malicious.
Luckily machine learning models can do exactly that if provided with proper training data! Thus, it is no surprise that one of the most powerful tools in the hands of defensive cybersecurity professionals is Machine Learning. Modern detection systems usually use a combination of machine learning models and pattern matching (regular expressions) to detect and prevent malicious activity on networks and devices.
This project will focus on teaching the fundamentals of data analysis and building/testing your own machine learning models in python. You’ll be using the open source libraries Pandas and Scikit-Learn.
Cybersecurity Machine Learning Careers and Trends
- Machine learning in cybersecurity is a growing field. The area was considered among top trends by McKinsey in 2022.
- In the CompTIA State of Cybersecurity 2024 it says last year there were 660,000 unfilled Cybersecurity positions. Also in the section titled Product: AI Drives the Cybersecurity Product Set to New Heights they note that 56% of respondents use AI and Machine Learning for Cybersecurity.
Additional Information
- ML in Cybersecurity – Crowdstrike
- AI for Cybersecurity – IBM
- Future of Cybersecurity and AI – Deloitte
Table of contents
Task 1:
Task 1
For the first task, let’s get familiar with some pandas basics. pandas is a Python library that deals with Dataframes, which you can think of as a Python class that handles tabular data. In the real world, you would create graphics and other visuals to better understand the dataset you are working with. You would also use plotting tools like PowerBi, Tableau, Data Studio, and Matplotlib. This step is generally known as Exploratory Data Analysis. Since we are using an autograder for this class, we will skip the plotting for this project.
For this task, we have released a local test suite. If you are struggling to understand the expected input and outputs for a function, please set up the test suite and use it to debug your function. Please note that the return lines for the provided skeleton functions are placeholders for the data types that the tests are expecting.
It’s critical you pass all tests locally before you submit to Gradescope for credit. Do not use Gradescope for debugging.
Theory
In this Task, we’re not yet getting into theory. It’s more nuts and bolts – you will learn the basics of pandas. pandas dataframes are something of a glorified list of lists, mixed in with a dictionary. You get a table of values with rows and columns, and you can modify the column names and index values for the rows. There are numerous functions built into pandas to let you manipulate the data in the dataframe.
To be clear, pandas is not part of Python, so when you look up docs, you’ll specifically want the official Pydata pandas docs. Note that we linked to the API docs here, this is the core of the docs you’ll be looking at.
You can always get started trying to solve a problem by looking at Stack Overflow posts in Google search results. There you’ll find ideas about how to use the pandas library. In the end, however, you should find yourself in the habit of looking directly at the docs for whichever library you are using, pandas in this case.
For those who might need a concrete example to get started, here’s how you would take a pandas dataframe column and return the average of its values:
import pandas as pd
# create a dataframe from a Python dict
df = pd.DataFrame({“color”:[“yellow”, “green”, “purple”, “red”], “weight”:[124,4.56,384,-2]})
df # shows the dataframe
| index | color | weight |
| 0 | yellow | 124 |
| 1 | green | 4.56 |
| 2 | purple | 384.00 |
| 4 | red | -2.00 |
Note that the column names are [“color”,”weight”] while the index is [0,1,2,3…] where […] the brackets denote a list.
Now that we have created a dataframe, we can find the average weight by summing the values under ‘weight’ and dividing them by the sum:
average = df[‘weight’].sum() / len(df[‘weight’])
average # if you put a variable as the last line, the variable is printed
127.63999999999999
Note: In the example above, we’re not paying attention to rounding, you will need to round your answers to the precision asked for in each Task.
Also note, we are using slightly older versions of the pandas, Python and other libraries so be sure to look at the docs for the appropriate library version. Often there’s a drop-down at the top of docs sites to select the older version.
Refer to the Submissions page for details about submitting your work.
Useful Links:
- pandas documentation — pandas documentation (pydata.org)
- What is Exploratory Data Analysis? – IBM
- Top Data Visualization Tools – KDnuggets
Deliverables:
- Complete the functions in task1.py
- For this task we have released a local test suite please set that up and use it to debug your function.
- Submit task1.py to gradescope
Instructions:
The Task1.py file has function skeletons that you will complete with Python code, mostly using the pandas library. The goal of each of these functions is to give you familiarity with the pandas library and some general Python concepts like classes, which you may not have seen before. See information about the function’s inputs, outputs, and skeletons below.
Table of contents
- find_data_type
- set_index_col
- reset_index_col
- set_col_type
- make_DF_from_2d_array
- sort_DF_by_column
- drop_NA_cols
- drop_NA_rows
- make_new_column
- left_merge_DFs_by_column
- simpleClass
- find_dataset_statistics
find_data_type
In this function you will take a dataset and the name of a column in it. You will return the column’s data type.
Useful Resources
https://pandas.pydata.org/pandas-docs/stable/reference/api/pandas.DataFrame.dtypes.html
INPUTS
- dataset – a pandas DataFrame that contains some data
- column_name – a Python string (str)
OUTPUTS
np.dtype – data type of the column
Function Skeleton
def find_data_type(dataset:pd.DataFrame,column_name:str) -> np.dtype:
return np.dtype()
set_index_col
In this function you will take a dataset and a series and set the index of the dataset to be the series
Useful Resources
https://pandas.pydata.org/pandas-docs/stable/reference/api/pandas.Index.html
INPUTS
- dataset – a pandas DataFrame that contains some data
- index – a pandas series that contains an index for the dataset
OUTPUTS
a pandas DataFrame indexed by the given index series
Function Skeleton
def set_index_col(dataset:pd.DataFrame,index:pd.Series) -> pd.DataFrame:
return pd.DataFrame()
reset_index_col
In this function you will take a dataset with an index already set and reindex the dataset from 0 to n-1, dropping the old index
Useful Resources
https://pandas.pydata.org/pandas-docs/stable/reference/api/pandas.DataFrame.reset_index.html
INPUTS
- dataset – a pandas DataFrame that contains some data
OUTPUTS
a pandas DataFrame indexed from 0 to n-1
Function Skeleton
def reset_index_col(dataset:pd.DataFrame) -> pd.DataFrame:
return pd.DataFrame()
set_col_type
In this function you will be given a DataFrame, column name and column type. You will edit the dataset to take the column name you are given and set it to be the type given in the input variable
Useful Resources
https://pandas.pydata.org/pandas-docs/stable/reference/api/pandas.DataFrame.astype.html
INPUTS
- dataset – a pandas DataFrame that contains some data
- column_name – a string containing the name of a column
- new_col_type – a Python type to change the column to
OUTPUTS
a pandas DataFrame with the column in column_name changed to the type in new_col_type
Function Skeleton
# Set astype (string, int, datetime)
def set_col_type(dataset:pd.DataFrame,column_name:str,new_col_type:type) -> pd.DataFrame:
return pd.DataFrame()
make_DF_from_2d_array
In this function you will take data in an array as well as column and row labels and use that information to create a pandas DataFrame
Useful Resources
https://pandas.pydata.org/pandas-docs/stable/reference/api/pandas.DataFrame.html
INPUTS
- array_2d – a 2 dimensional numpy array of values
- column_name_list – a list of strings holding column names
- index – a pandas series holding the row index’s
OUTPUTS
a pandas DataFrame with columns set from column_name_list, row index set from index and data set from array_2d
Function Skeleton
# Take Matrix of numbers and make it into a DataFrame with column name and index numbering
def make_DF_from_2d_array(array_2d:np.array,column_name_list:list[str],index:pd.Series) -> pd.DataFrame:
return pd.DataFrame()
sort_DF_by_column
In this function, you are given a dataset and column name. You will return a sorted dataset (sorting rows by the value of the specified column) either in descending or ascending order, depending on the value in the descending variable.
Useful Resources
https://pandas.pydata.org/pandas-docs/stable/reference/api/pandas.DataFrame.sort_values.html
INPUTS
- dataset – a pandas DataFrame that contains some data
- column_name – a string that contains the column name to sort the data on
- descending – a boolean value (True or False) for if the column should be sorted in descending order
OUTPUTS
a pandas DataFrame sorted by the given column name and in descending or ascending order depending on the value of the descending variable
Function Skeleton
# Sort DataFrame by values
def sort_DF_by_column(dataset:pd.DataFrame,column_name:str,descending:bool) -> pd.DataFrame:
return pd.DataFrame()
drop_NA_cols
In this function you are given a DataFrame. You will return a DataFrame with any columns containing NA values dropped
Useful Resources
https://pandas.pydata.org/pandas-docs/stable/reference/api/pandas.DataFrame.dropna.html
INPUTS
- dataset – a pandas DataFrame that contains some data
OUTPUTS
a pandas DataFrame with any columns that contain an NA value dropped
Function Skeleton
# Drop NA values in DataFrame Columns
def drop_NA_cols(dataset:pd.DataFrame) -> pd.DataFrame:
return pd.DataFrame()
drop_NA_rows
In this function you are given a DataFrame you will return a DataFrame with any rows containing NA values dropped
Useful Resources
https://pandas.pydata.org/pandas-docs/stable/reference/api/pandas.DataFrame.dropna.html
INPUTS
- dataset – a pandas DataFrame that contains some data
OUTPUTS
a pandas DataFrame with any rows that contain an NA value dropped
Function Skeleton
def drop_NA_rows(dataset:pd.DataFrame) -> pd.DataFrame:
return pd.DataFrame()
make_new_column
In this function you are given a dataset, a new column name and a string value to fill in the new column. Add the new column to the dataset and return the dataset.
Useful Resources
https://pandas.pydata.org/pandas-docs/stable/getting_started/intro_tutorials/05_add_columns.html
INPUTS
- dataset – a pandas DataFrame that contains some data
- new_column_name – a string containing the name of the new column to be created
- new_column_value – a string containing a static value that will be set for the new column for every row
OUTPUTS
a pandas DataFrame with the new column created named new_column_name and filled with the value in new_column_value
Function Skeleton
def make_new_column(dataset:pd.DataFrame,new_column_name:str,new_column_value:list) -> pd.DataFrame:
return pd.DataFrame()
left_merge_DFs_by_column
In this function you are given 2 datasets and the name of a column with which you will left join them on using the pandas merge method. The left dataset is dataset1 right dataset is dataset2, for example purposes.
Useful Resources
https://pandas.pydata.org/pandas-docs/stable/reference/api/pandas.DataFrame.merge.html https://stackoverflow.com/questions/53645882/pandas-merging-101
INPUTS
- left_dataset – a pandas DataFrame that contains some data
- right_dataset – a pandas DataFrame that contains some data
- join_col_name – a string containing the column name to join the two DataFrames on
OUTPUTS
a pandas DataFrame containing the two datasets left joined together on the given column name
Function Skeleton
def left_merge_DFs_by_column(left_dataset:pd.DataFrame,right_dataset:pd.DataFrame,join_col_name:str) -> pd.DataFrame:
return pd.DataFrame()
simpleClass
This project will require you to work with Python Classes. If you are not familiar with them we suggest learning a bit more about them.
You will take the inputs into the class initialization and set them as instance variables (of the same name) in the Python class.
Useful Resources
https://www.w3schools.com/python/python_classes.asp
INPUTS
- length – an integer
- width – an integer
- height – an integer
OUTPUTS
None, just setup the init method in the class.
Function Skeleton
class simpleClass():
def __init__(self, length:int, width:int, height:int):
pass
find_dataset_statistics
Now that you have learned a bit about pandas DataFrames, we will use them to generate some simple summary statistics for a DataFrame. You will be given the dataset as an input variable, as well as a column name for a column in the dataset that serves as a label column. This label column contains binary values (0 and 1) that you also summarize, and also the variable to predict.
In this context:
- 0 represents a “negative” sample (e.g. if the column is IsAVirus and we think it is false)
- 1 represents a “positive” sample (e.g. if the column is IsAVirus and we think it is true)
This type of binary classification is common in machine learning tasks where we want to be able to predict the field. An example of where this could be useful would be if we were looking at network data, and the label column was IsVirus. We could then analyze the network data of Georgia Tech services and predict if incoming files look like a virus (and if we should alert the security team).
Useful Resources
- https://www.learndatasci.com/glossary/binary-classification/
- https://developers.google.com/machine-learning/crash-course/framing/ml-terminology
INPUTS
- dataset – a pandas DataFrame that contains some data
- label_col – a string containing the name of the label column
OUTPUTS
- n_records (int) – the number of rows in the dataset
- n_columns (int) – the number of columns in the dataset
- n_negative (int) – the number of “negative” samples in the dataset (the argument label column equals 0)
- n_positive (int) – the number of “positive” samples in the dataset (the argument label column equals 1)
- perc_positive (int) – the percentage (out of 100%) of positive samples in the dataset; truncate anything after the decimal
Hint: Consider using the int function to type cast decimals
Function Skeleton
def find_dataset_statistics(dataset:pd.DataFrame,label_col:str) -> tuple[int,int,int,int,int]:
n_records = #TODO
n_columns = #TODO
n_negative = #TODO
n_positive = #TODO
perc_positive = #TODO
return n_records,n_columns,n_negative,n_positive,perc_positive
Task 2:
Now that you have a basic understanding of pandas and the dataset, it is time to dive into some more complex data processing tasks.
Theory
In machine learning a common goal is to train a model on one set of data. Then we validate the model on a similarly structured but different set of data. You could, for example, train the model on data you have collected historically. Then you would validate the model against real-time data as it comes in, seeing how well it predicts the new data coming in.
If you’re looking at a past dataset as we are in these tasks, we need to treat different parts of the data differently to be able to develop and test models. We segregate the data into test and training portions. We train the model on the training data and test the developed model on the test data to see how well it predicts the results.
You should never train your models on test data, only on training data.
Notes
At a high level it is important to hold out a subset of your data when you train a model. You can see what the expected performance is on unseen sample. Thus, you can determine if the resulting model is overfit (performs much better on training data vs test data).
Preprocessing data is essential because most models only take in numerical values. Therefore, categorical features need to be “encoded” to numerical values so that models can use them. A machine learning model may not be able to make sense of “green”, “blue” and “red.” In preprocessing, we’ll convert those to integer values 1, 2 and 3, for example. It’s an interesting question as to what happens when you have training data that has “green,” “red” and blue,” but your testing data says “yellow.”
Numerical scaling can be more or less useful depending on the type of model used, but it is especially important in linear models. Numerical scaling is typically taking positive value and “compressing” them into a range between 0 and 1 (inclusive) that retains the relationships among the original data.
These preprocessing techniques will provide you with options to augment your dataset and improve model performance.
Useful Links:
- Training and Test Sets – Machine Learning – Google Developers
- Bias–variance tradeoff – Wikipedia
- Overfitting – Wikipedia
- Categorical and Numerical Types of Data – 365 Data Science
- scikit-learn: machine learning in Python — scikit-learn 1.2.1 documentation
Deliverables:
- Complete the functions and methods in task2.py
- For this task we have released a local test suite please set that up and use it to debug your function.
- Submit task2.py to Gradescope when you pass all local tests. Refer to the Submissions page for details.
Instructions:
The Task2.py File has function skeletons that you will complete with python code (mostly using the pandas and scikit-learn libraries). The Goal of each of these functions is to give you familiarity with the applied concepts of Splitting and Preprocessing Data. See information about the Function’s Inputs, Outputs and Skeletons below
Table of contents
tts
In this function, you will take:
- a dataset
- the name of its label column
- a percentage of the data to put into the test set
- whether you should stratify on the label column
- a random state to set the scikit-learn function
You will return features and labels for the training and test sets.
At a high level, you can separate the task into two subtasks. The first is splitting your dataset into both features and labels (by columns), and the second is splitting your dataset into training and test sets (by rows). You should use the scikit-learn train_test_split function but will have to write wrapper code around it based on the input values we give you.
Useful Resources
- https://scikit-learn.org/stable/modules/generated/sklearn.model_selection.train_test_split.html
- https://developers.google.com/machine-learning/crash-course/framing/ml-terminology
- https://stackoverflow.com/questions/40898019/what-is-the-difference-between-a-feature-and-a-label
INPUTS
- dataset – a pandas DataFrame that contains some data
- label_col – a string containing the name of the column that contains the label values (what our model wants to predict)
- test_size – a float containing the decimal value of the percentage of the number of rows that the test set should be out of the dataset
- should_stratify – a boolean (True or False) value indicating if the resulting train/test split should be stratified or not
- random_state – an integer value to set the randomness of the function (useful for repeatability especially when autograding)
OUTPUTS
- train_features – a pandas DataFrame that contains the train rows and the feature columns
- test_features – a pandas DataFrame that contains the test rows and the feature columns
- train_labels – a pandas DataFrame that contains the train rows and the label column
- test_labels – a pandas DataFrame that contains the test rows and the label column
Function Skeleton
def tts( dataset: pd.DataFrame,
label_col: str,
test_size: float,
should_stratify: bool,
random_state: int) -> tuple[pd.DataFrame,pd.DataFrame,pd.Series,pd.Series]:
# TODO
return train_features,test_features,train_labels,test_labels
PreprocessDataset
The PreprocessDataset Class contains a code skeleton with nine methods for you to implement. Most methods will be split into two parts: one that will be run on the training dataset and one that will be run on the test dataset. In Data Science/Machine Learning, this is done to avoid something called Data Leakage.
For this assignment, we don’t expect you to understand the nuances of the concept, but we will have you follow principles that will minimize the chances of it occurring. You will accomplish this by splitting data into training and test datasets and processing those datasets in slightly different ways.
Generally, for everything you do in this project, and if you do any ML or Data Science work in the future, you should train/fit on the training data first, then predict/transform on the training and test data. That holds up for basic preprocessing steps like task 2 and for complex models like you will see in tasks 3 and 4.
For the purposes of this project, you should never train or fit on the test data (and more generally in any ML project) because your test data is expected to give you an understanding of how your model/predictions will perform on unseen data. If you fit even a preprocessing step to your test data, then you are either giving the model information about the test set it wouldn’t have about unseen data (if you combine train and test and fit to both), or you are providing a different preprocessing than the model is expecting (if you fit a different preprocessor to the test data), and your model would not be expected to perform well.
Note: You should train/fit using the train dataset; then, once you have a fit encoder/scaler/pca/model instance, you can transform/predict on the training and test data.
You will also notice that we are only preprocessing the Features and not the Labels. There are a few cases where preprocessing steps on labels may be helpful in modeling, but they are definitely more advanced and out of the scope of this introduction. Generally, you will not need to do any preprocessing to your labels beyond potentially encoding a string value (i.e., “Malware” or “Benign”) into an integer value (0 or 1), which is called Label Encoding.
PreprocessDataset:__init__
Similar to the Task1 simpleClass subtask you previously completed you will initialize the class by adding instance variables (add all the inputs to the class).
Useful Resources
INPUTS
- one_hot_encode_cols – a list of column names (strings) that should be one hot encoded by the one hot encode methods
- min_max_scale_cols – a list of column names (strings) that should be min/max scaled by the min/max scaling methods
- n_components – an int that contains the number of components that should be used in Principal Component Analysis
- feature_engineering_functions – a dictionary that contains feature name and function to create that feature as a key value pair (example shown below)
Example of feature_engineering_functions:
def double_height(dataframe:pd.DataFrame):
return dataframe[“height”] * 2
def half_height(dataframe:pd.DataFrame):
return dataframe[“height”] / 2
feature_engineering_functions = {“double_height”:double_height,”half_height”:half_height}
Don’t worry about copying it we also have examples in the local test cases this is just provided as an illustration of what to expect in your function.
OUTPUTS
None, just assign all the input parameters to class variables.
Also per the instructions below, you’ll return here and create another instance variable: a scikit-learn OneHotEncoder with any Parameters you may need later.
Function Skeleton
def __init__(self,
one_hot_encode_cols:list[str],
min_max_scale_cols:list[str],
n_components:int,
feature_engineering_functions:dict
):
# TODO: Add any instance variables you may need to make your functions work
return
PreprocessDataset:one_hot_encode_columns_train and one_hot_encode_columns_test
One Hot Encoding is the process of taking a column and returning a binary vector representing the various values within it. There is a separate function for the training and test datasets since they should be handled separately to avoid data leakage (see the 3rd link in Useful Resources for a little more info on how to handle them).
Pseudocode
one_hot_encode_columns_train()
- In the PreprocessDataset __init__() method initialize an instance variable containing a scikit-learn OneHotEncoder with any parameters you may need.
- Split train_features into two DataFrames: one with only the columns you want to one hot encode (using one_hot_encode_cols) and another with all the other columns.
- Fit the OneHotEncoder using the DataFrame you split from train_features with the columns you want to encode.
- Transform the DataFrame you split from train_features with the columns you want to encode using the fitted OneHotEncoder.
- Create a DataFrame from the 2D array of data that the output from step 4 gave you, with column names in the form of columnName_categoryName (there should be an attribute in OneHotEncoder that can help you with this) and the same index that train_features had.
- Concatenate the DataFrame you made in step 5 with the DataFrame of other columns from step 2.
one_hot_encode_columns_test()
- Split test_features into two DataFrames: one with only the columns you want to one hot encode (usingone_hot_encode_cols) and another with all the other columns.
- Transform the DataFrame you split from test_features with the columns you want to encode using the OneHotEncoder you fit in one_hot_encode_columns_train()
- Create a DataFrame from the 2D array of data that the output from step 2 gave you, with column names in the form of columnName_categoryName (there should be an attribute in OneHotEncoder that can help you with this) and the same index that test_features had.
- Concatenate the DataFrame you made in step 3 with the DataFrame of other columns from step 1.
Example Walkthrough (from Local Testing suite):
INPUTS:
one_hot_encode_cols
[“src_ip”,”protocol”]
Train Features
| Index | src_ip | protocol | bytes_in | bytes_out | time |
| 3 | 104.128.239.2 | TCP | 1054 | 9108 | 2024-12-20 09:15:42 |
| 1 | 103.31.4.0 | TCP | 3412 | 7567 | 2024-12-19 23:33:21 |
| 7 | 10.112.171.199 | TCP | 553 | 2331 | 2024-12-20 01:26:51 |
| 9 | 108.162.192.0 | ICMP | 8423 | 3805 | 2024-12-20 11:55:52 |
| 5 | 216.189.157.2 | UDP | 9328 | 7089 | 2024-12-20 20:50:30 |
| 0 | 103.21.244.0 | UDP | 2782 | 108 | 2024-12-20 11:16:23 |
| 4 | 45.58.56.3 | TCP | 6959 | 298 | 2024-12-20 15:30:56 |
| 2 | 108.162.192.0 | UDP | 8856 | 3510 | 2024-12-19 22:42:38 |
Test Features
| Index | src_ip | protocol | bytes_in | bytes_out | time |
| 8 | 10.130.94.70 | TCP | 8172 | 5321 | 2024-12-20 17:00:19 |
| 6 | 103.21.244.0 | UDP | 9871 | 7476 | 2024-12-20 03:16:40 |
Train DataFrames at each step:
2.
DataFrame with columns to encode:
| Index | src_ip | protocol |
| 3 | 104.128.239.2 | TCP |
| 1 | 103.31.4.0 | TCP |
| 7 | 10.112.171.199 | TCP |
| 9 | 108.162.192.0 | ICMP |
| 5 | 216.189.157.2 | UDP |
| 0 | 103.21.244.0 | UDP |
| 4 | 45.58.56.3 | TCP |
| 2 | 108.162.192.0 | UDP |
DataFrame with other columns:
| Index | bytes_in | bytes_out | time |
| 3 | 1054 | 9108 | 2024-12-20 09:15:42 |
| 1 | 3412 | 7567 | 2024-12-19 23:33:21 |
| 7 | 553 | 2331 | 2024-12-20 01:26:51 |
| 9 | 8423 | 3805 | 2024-12-20 11:55:52 |
| 5 | 9328 | 7089 | 2024-12-20 20:50:30 |
| 0 | 2782 | 108 | 2024-12-20 11:16:23 |
| 4 | 6959 | 298 | 2024-12-20 15:30:56 |
| 2 | 8856 | 3510 | 2024-12-19 22:42:38 |
4.
One Hot Encoded 2d array:
| 0 | 0 | 0 | 1 | 0 | 0 | 0 | 0 | 1 | 0 |
| 0 | 0 | 1 | 0 | 0 | 0 | 0 | 0 | 1 | 0 |
| 1 | 0 | 0 | 0 | 0 | 0 | 0 | 0 | 1 | 0 |
| 0 | 0 | 0 | 0 | 1 | 0 | 0 | 1 | 0 | 0 |
| 0 | 0 | 0 | 0 | 0 | 1 | 0 | 0 | 0 | 1 |
| 0 | 1 | 0 | 0 | 0 | 0 | 0 | 0 | 0 | 1 |
| 0 | 0 | 0 | 0 | 0 | 0 | 1 | 0 | 1 | 0 |
| 0 | 0 | 0 | 0 | 1 | 0 | 0 | 0 | 0 | 1 |
5.
One Hot Encoded DataFrame with Index and Column Names
| Index | src_ip_10.112.171.199 | src_ip_103.21.244.0 | src_ip_103.31.4.0 | src_ip_104.128.239.2 | src_ip_108.162.192.0 | src_ip_216.189.157.2 | src_ip_45.58.56.3 | protocol_ICMP | protocol_TCP | protocol_UDP |
| 3 | 0 | 0 | 0 | 1 | 0 | 0 | 0 | 0 | 1 | 0 |
| 1 | 0 | 0 | 1 | 0 | 0 | 0 | 0 | 0 | 1 | 0 |
| 7 | 1 | 0 | 0 | 0 | 0 | 0 | 0 | 0 | 1 | 0 |
| 9 | 0 | 0 | 0 | 0 | 1 | 0 | 0 | 1 | 0 | 0 |
| 5 | 0 | 0 | 0 | 0 | 0 | 1 | 0 | 0 | 0 | 1 |
| 0 | 0 | 1 | 0 | 0 | 0 | 0 | 0 | 0 | 0 | 1 |
| 4 | 0 | 0 | 0 | 0 | 0 | 0 | 1 | 0 | 1 | 0 |
| 2 | 0 | 0 | 0 | 0 | 1 | 0 | 0 | 0 | 0 | 1 |
6.
Final DataFrame with passthrough/other columns joined back
| Index | src_ip_10.112.171.199 | src_ip_103.21.244.0 | src_ip_103.31.4.0 | src_ip_104.128.239.2 | src_ip_108.162.192.0 | src_ip_216.189.157.2 | src_ip_45.58.56.3 | protocol_ICMP | protocol_TCP | protocol_UDP | bytes_in | bytes_out | time |
| 3 | 0 | 0 | 0 | 1 | 0 | 0 | 0 | 0 | 1 | 0 | 1054 | 9108 | 2024-12-20 09:15:42 |
| 1 | 0 | 0 | 1 | 0 | 0 | 0 | 0 | 0 | 1 | 0 | 3412 | 7567 | 2024-12-19 23:33:21 |
| 7 | 1 | 0 | 0 | 0 | 0 | 0 | 0 | 0 | 1 | 0 | 553 | 2331 | 2024-12-20 01:26:51 |
| 9 | 0 | 0 | 0 | 0 | 1 | 0 | 0 | 1 | 0 | 0 | 8423 | 3805 | 2024-12-20 11:55:52 |
| 5 | 0 | 0 | 0 | 0 | 0 | 1 | 0 | 0 | 0 | 1 | 9328 | 7089 | 2024-12-20 20:50:30 |
| 0 | 0 | 1 | 0 | 0 | 0 | 0 | 0 | 0 | 0 | 1 | 2782 | 108 | 2024-12-20 11:16:23 |
| 4 | 0 | 0 | 0 | 0 | 0 | 0 | 1 | 0 | 1 | 0 | 6959 | 298 | 2024-12-20 15:30:56 |
| 2 | 0 | 0 | 0 | 0 | 1 | 0 | 0 | 0 | 0 | 1 | 8856 | 3510 | 2024-12-19 22:42:38 |
Test DataFrames at each step:
1.
DataFrame with columns to encode:
| Index | src_ip | protocol |
| 8 | 10.130.94.70 | TCP |
| 6 | 103.21.244.0 | UDP |
DataFrame with other columns:
| Index | bytes_in | bytes_out | time |
| 8 | 8172 | 5321 | 2024-12-20 17:00:19 |
| 6 | 9871 | 7476 | 2024-12-20 03:16:40 |
2.
One Hot Encoded 2d array:
| 0 | 0 | 0 | 0 | 0 | 0 | 0 | 0 | 1 | 0 |
| 0 | 1 | 0 | 0 | 0 | 0 | 0 | 0 | 0 | 1 |
3.
One Hot Encoded DataFrame with Index and Column Names
| Index | src_ip_10.112.171.199 | src_ip_103.21.244.0 | src_ip_103.31.4.0 | src_ip_104.128.239.2 | src_ip_108.162.192.0 | src_ip_216.189.157.2 | src_ip_45.58.56.3 | protocol_ICMP | protocol_TCP | protocol_UDP |
| 8 | 0.0 | 0.0 | 0.0 | 0.0 | 0.0 | 0.0 | 0.0 | 0.0 | 1.0 | 0.0 |
| 6 | 0.0 | 1.0 | 0.0 | 0.0 | 0.0 | 0.0 | 0.0 | 0.0 | 0.0 | 1.0 |
4.
Final DataFrame with passthrough columns joined back
| Index | src_ip_10.112.171.199 | src_ip_103.21.244.0 | src_ip_103.31.4.0 | src_ip_104.128.239.2 | src_ip_108.162.192.0 | src_ip_216.189.157.2 | src_ip_45.58.56.3 | protocol_ICMP | protocol_TCP | protocol_UDP | bytes_in | bytes_out | time |
| 8 | 0.0 | 0.0 | 0.0 | 0.0 | 0.0 | 0.0 | 0.0 | 0.0 | 1.0 | 0.0 | 8172 | 5321 | 2024-12-20 17:00:19 |
| 6 | 0.0 | 1.0 | 0.0 | 0.0 | 0.0 | 0.0 | 0.0 | 0.0 | 0.0 | 1.0 | 9871 | 7476 | 2024-12-20 03:16:40 |
Note: For the local tests and autograder use the column naming scheme of joining the previous column name and the column value with an underscore (similar to above where Type -> Type_Fruit and Type_Vegetable)
Note 2: Since you should only be fitting your encoder on the training data, if there are values in your test set that are different than those in the training set, you will denote that with 0s. In the example above, let’s say we have a row in the test set with pizza, which is neither a fruit nor vegetable for the Type_Fruit and Type_Vegetable. It should result in a 0 for both columns. If you don’t handle these properly, you may get errors like Test Failed: Found unknown categories.
Note 3: You may be tempted to use the pandas function get_dummies to solve this task, but its a trap. It seems easier, but you will have to do a lot more work to make it handle a train/test split. So, we suggest you use scikit-learn’s OneHotEncoder.
Useful Resources
- https://www.educative.io/blog/one-hot-encoding
- https://developers.google.com/machine-learning/data-prep/transform/transform-categorical
- https://scikit-learn.org/stable/modules/generated/sklearn.preprocessing.OneHotEncoder.html#sklearn.preprocessing.OneHotEncoder
- https://datascience.stackexchange.com/questions/103211/do-we-need-to-pre-process-both-the-test-and-train-data-set
INPUTS
- Use the needed instance variables you set in the __init__ method
- train_features – a dataset split by a function similar to tts which should be used in the training/fitting steps
- test_features – a dataset split by a function similar to tts which should be used in the test steps
OUTPUTS
a pandas DataFrame with the columns listed in one_hot_encode_cols one hot encoded and all other columns in the DataFrame unchanged
Function Skeleton
def one_hot_encode_columns_train(self,train_features:pd.DataFrame) -> pd.DataFrame:
one_hot_encoded_dataset = pd.DataFrame()
return one_hot_encoded_dataset
def one_hot_encode_columns_test(self,test_features:pd.DataFrame) -> pd.DataFrame:
one_hot_encoded_dataset = pd.DataFrame()
return one_hot_encoded_dataset
PreprocessDataset:min_max_scaled_columns_train and min_max_scaled_columns_test
Min/Max Scaling is a process to transform numerical features to a specific range, typically [0, 1], to ensure that input values are comparable (similar to how you may have heard of “normalizing” data) and is a crucial preprocessing step for many machine learning algos. In particular this standardization is essential for algorithms like linear regression, logistic regression, k-means, and neural networks, which can be sensitive to the scale of input features, whereas some algos like decision trees are less impacted.
By applying Min/Max Scaling, we prevent feature dominance, to ideally improve performance and accuracy of these algorithms and improve training convergence. It’s a recommended step to ensure your models are trained on consistent and standardized data.
For the provided assignment you should use the scikit-learn MinMaxScaler function (linked in the resources below) rather than attempting to implement your own scaling function.
The rough implementation of the scikit-learn function is provided below for educational purposes.
X_std = (X – X.min(axis=0)) / (X.max(axis=0) – X.min(axis=0))
X_scaled = X_std * (max – min) + min
Note: There are separate functions for the training and test datasets to help avoid data leakage between the test/train datasets. Please refer to the 3rd link in Useful Resources for more information on how to handle this – namely that we should still scale the test data based on our “knowledge” of the train dataset.
Example Dataframe:
| Item | Price | Count | Type |
| Apples | 1.99 | 7 | Fruit |
| Broccoli | 1.29 | 435 | Vegtable |
| Bananas | 0.99 | 123 | Fruit |
| Oranges | 2.79 | 25 | Fruit |
| Pineapples | 4.89 | 5234 | Fruit |
Example Min Max Scaled Dataframe (rounded to 4 decimal places):
| Item | Price | Count | Type |
| Apples | 0.2564 | 7 | Fruit |
| Broccoli | 0.0769 | 435 | Vegtable |
| Bananas | 0 | 123 | Fruit |
| Oranges | 0.4615 | 25 | Fruit |
| Pineapples | 1 | 5234 | Fruit |
Note: For the Autograder use the same column name as the original column (ex: Price -> Price)
Useful Resources
- https://developers.google.com/machine-learning/data-prep/transform/normalization
- https://scikit-learn.org/stable/modules/generated/sklearn.preprocessing.MinMaxScaler.html#sklearn.preprocessing.MinMaxScaler
- https://datascience.stackexchange.com/questions/103211/do-we-need-to-pre-process-both-the-test-and-train-data-set
INPUTS
- Use the needed instance variables you set in the __init__ method
- train_features – a dataset split by a function similar to tts which should be used in the training/fitting steps
- test_features – a dataset split by a function similar to tts which should be used in the test steps
OUTPUTS
a pandas DataFrame with the columns listed in min_max_scale_cols min/max scaled and all other columns in the DataFrame unchanged
Function Skeleton
def min_max_scaled_columns_train(self,train_features:pd.DataFrame) -> pd.DataFrame:
min_max_scaled_dataset = pd.DataFrame()
return min_max_scaled_dataset
def min_max_scaled_columns_test(self,test_features:pd.DataFrame) -> pd.DataFrame:
min_max_scaled_dataset = pd.DataFrame()
return min_max_scaled_dataset
PreprocessDataset:pca_train and pca_test
Principal Component Analysis is a dimensionality reduction technique (column reduction). It aims to take the variance in your input columns and map the columns into N columns that contain as much of the variance as it can. This technique can be useful if you are trying to train a model faster and has some more advanced uses, especially when training models on data which has many columns but few rows. There is a separate function for the training and test datasets because they should be handled separately to avoid data leakage (see the 3rd link in Useful Resources for a little more info on how to handle them).
Note 1: For the local tests and autograder, use the column naming scheme of column names: component_1, component_2 .. component_n for the n_components passed into the __init__ method.
Note 2: For your PCA outputs to match the local tests and autograder, make sure you set the seed using a random state of 0 when you initialize the PCA function.
Note 3: Since PCA does not work with NA values, make sure you drop any columns that have NA values before running PCA.
Useful Resources
- https://builtin.com/data-science/step-step-explanation-principal-component-analysis
- https://scikit-learn.org/stable/modules/generated/sklearn.decomposition.PCA.html#sklearn.decomposition.PCA
- https://datascience.stackexchange.com/questions/103211/do-we-need-to-pre-process-both-the-test-and-train-data-set
INPUTS
- Use the needed instance variables you set in the __init__ method
- train_features – a dataset split by a function similar to tts which should be used in the training/fitting steps
- test_features – a dataset split by a function similar to tts which should be used in the test steps
OUTPUTS
a pandas DataFrame with the generated pca values and using column names: component_1, component_2 .. component_n
Function Skeleton
def pca_train(self,train_features:pd.DataFrame) -> pd.DataFrame:
# TODO: Read the function description in https://github.gatech.edu/pages/cs6035-tools/cs6035-tools.github.io/Projects/Machine_Learning/Task2.html and implement the function as described
pca_dataset = pd.DataFrame()
return pca_dataset
def pca_test(self,test_features:pd.DataFrame) -> pd.DataFrame:
# TODO: Read the function description in https://github.gatech.edu/pages/cs6035-tools/cs6035-tools.github.io/Projects/Machine_Learning/Task2.html and implement the function as described
pca_dataset = pd.DataFrame()
return pca_dataset
PreprocessDataset:feature_engineering_train, feature_engineering_test
Feature Engineering is a process of using domain knowledge (physics, geometry, sports statistics, business metrics, etc.) to create new features (columns) out of the existing data. This could mean creating an area feature when given the length and width of a triangle or extracting the major and minor version number from a software version or more complex logic depending on the scenario.
In cybersecurity in particular, feature engineering is crucial for using domain expert’s (e.g. a security analyst) experience to identify anomalous behavior that might signify a security breach. This could involve creating features that represent deviations from established baselines, such as unusual file access patterns, unexpected network connections, or sudden spikes in CPU usage. These anomaly-based features can help distinguish malicious activity from normal system operations, but the system does not know what data patterns mean anomalous off-hand – that is where you as the domain expert can help by creating features.
These methods utilize a dictionary, feature_engineering_functions, passed to the class constructor (__init__). This dictionary defines how to generate new features:
- Keys: Strings representing new column names.
- Values: Functions that:
- Take a DataFrame as input.
- Return a Pandas Series (the new column’s values).
Example of what could be passed as the feature_engineering_functions dictionary to __init__:
import pandas as pd
def double_height(dataframe: pd.DataFrame) -> pd.Series:
return dataframe[“height”] * 2
def half_height(dataframe: pd.DataFrame) -> pd.Series:
return dataframe[“height”] / 2
example_feature_engineering_functions = {
“double_height”: double_height, # Note that functions in python can be passed around and used just like data!
“half_height”: half_height
}
# and the class may be been created like this…
# preprocessor = PreprocessDataset(…, feature_engineering_functions=example_feature_engineering_functions, …)
In particular for this method, you will be taking in a dictionary with a column name and a function that takes in a DataFrame and returns a column. You’ll be using that to create a new column with the name in the dictionary key. Therefore if you were given the above functions, you would create two new columns named “double_height” and “half_height” in your Dataframe.
Useful Resources
- https://en.wikipedia.org/wiki/Feature_engineering
- https://www.geeksforgeeks.org/what-is-feature-engineering/
- Passing Function as an Argument in Python – GeeksforGeeks
INPUTS
- Use the needed instance variables you set in the __init__ method
- train_features – a dataset split by a function similar to tts which should be used in the training/fitting steps
- test_features – a dataset split by a function similar to tts which should be used in the test steps
OUTPUTS
a pandas dataframe with the features described in feature_engineering_train and feature_engineering_test added as new columns and all other columns in the dataframe unchanged
Function Skeleton
def feature_engineering_train(self,train_features:pd.DataFrame) -> pd.DataFrame:
feature_engineered_dataset = pd.DataFrame()
return feature_engineered_dataset
def feature_engineering_test(self,test_features:pd.DataFrame) -> pd.DataFrame:
feature_engineered_dataset = pd.DataFrame()
return feature_engineered_dataset
PreprocessDataset:preprocess_train, preprocess_test
Now, we will put three of the above methods together into a preprocess function. This function will take in a dataset and perform encoding, scaling, and feature engineering using the above methods and their respective columns. You should not perform PCA for this function.
Useful Resources
See resources for one hot encoding, min/max scaling and feature engineering above
INPUTS
- Use the needed instance variables you set in the __init__ method
- train_features – a dataset split by a function similar to tts which should be used in the training/fitting steps
- test_features – a dataset split by a function similar to tts which should be used in the test steps
OUTPUTS
a pandas dataframe for both test and train features with the columns in one_hot_encode_cols encoded, the columns in min_max_scale_cols scaled and the columns described in feature_engineering_functions engineered. You do not need to use PCA here.
Function Skeleton
def preprocess_train(self,train_features:pd.DataFrame) -> pd.DataFrame:
train_features = pd.DataFrame()
return train_features
def preprocess_test(self,test_features:pd.DataFrame) -> pd.DataFrame:
test_features = pd.DataFrame()
return test_features
Task 3
In Task 2 you learned how to split a dataset into training and testing components. Now it’s time to learn about using a K-means model. We will run a basic model on the data to cluster files (rows) with similar attributes together. We will use an unsupervised model.
Theory
An unsupervised model has no label column. By constrast, in supervised learning (which you’ll see in Task 4) the data has features and targets/labels. These labels are effectively an answer key to the data in the feature columns. You don’t have this answer key in unsupervised learning, instead you’re working on data without labels. You’ll need to choose algorithms that can learn from the data, exclusively, without the benefit of lablels.
We start with K-means because it is simple to understand the algorithm. For the Mathematics people, you can look at the underlying data structure, a Voronoi diagram. Based on squared Euclidian distances, K-means creates clusters of similar datapoints. Each cluster has a centroid. The idea is that for each sample, it’s associated/clustered with the centroid that is the “closest.”
Closest is an interesting concept in higher dimensions. You can think of each feature in a dataset as a dimension in the data. If it’s 2d or 3d, we can visualize it easily. Concepts of distance are clear in 2d and 3d, and they work similarly in 4+d.
If you read the Wikipedia articles for K-means you’ll see a discussion of the use of “squared Euclidean distances” in K-means. This is compared with simple Euclidean distances in the Weber problem, and better approaches resulting from k-medians and k-mediods is discussed.
Please use scikit-learn to create the model and Yellowbrick to determine the optimal value of k for the dataset.
So far, we have functions to split the data and preprocess it. Now, we will run a basic model on the data to cluster files (rows) with similar attributes together. We will use an unsupervised model (model with no label column), K-means. Again, use scikit-learn to create the model and Yellowbrick to determine the optimal value of k for the dataset.
Refer to the Submissions page for details about submitting your work.
Useful Links:
Deliverables:
- Complete the KmeansClustering class in task3.py.
- For this task we have released a local test suite please set that up and use it to debug your function.
- Submit task3.py to Gradescope when you pass all local tests. Refer to the Submissions page for details.
Local Test Dataset Information
For this task the local test dataset we are using is the NATICUSdroid dataset, which contains 86 columns of data related to android permissions used by benign and malicious Android applications released between 2010 and 2019. For more information such as the introductory paper and the Citations/Acknowledgements you can view the dataset site in the UCI ML repository. In this specific case clustering can be a useful tool to group apps that request similar permissions together. The team that created this dataset hypothesized that malicious apps would exhibit distinct patterns in the types of permissions they request compared to benign apps. This difference in permission request patterns could potentially be used to distinguish between malicious and benign applications.
Instructions:
The Task3.py File has function skeletons that you will complete with Python code. You will mostly be using the pandas, Yellowbrick and scikit-learn libraries. The goal of each of these functions is to give you familiarity with the applied concepts of Unsupervised Learning. See information about the function’s Inputs, Outputs and Skeletons below.
KmeansClustering
The KmeansClustering Class contains a code skeleton with 4 methods for you to implement.
Note: You should train/fit using the train dataset then once you have a Yellowbrick/K-means model instance you can transform/predict on the training and test data.
KmeansClustering:__init__
Similar to Task 1, you will initialize the class by adding instance variables as needed.
Useful Resources
INPUTS
- random_state – an integer that should be used to set the scikit-learn randomness so the model results will be repeatable which is required for the tests and autograder
OUTPUTS
None
Function Skeleton
def __init__(self,
random_state: int
):
# TODO: Add any state variables you may need to make your functions work
pass
KmeansClustering:kmeans_train
Kmeans Clustering is a process of grouping together similar rows together and assigning them to a cluster. For this method you will use the training data to fit an optimal K-means cluster on the data.
To help you get started we have provided a list of subtasks to complete for this task:
- Initialize a scikit-learn K-means model using random_state from the __init__ method and setting n_init = 10.
- Try to find the best “k” to use for the KMeans Clustering.
- Initialize a Yellowbrick KElbowVisualizer with the K-means model.
- Use that visualizer to search for the optimal value of k [between 1 (inclusive) and 10, (exclusive) in mathmatical expression that would be [1,10)].
- Use the provided resources to understand how to interpret the visualization
- Train the KElbowVisualizer on the training data and determine the optimal k value.
- Now, train a K-means model with the proper initialization for that optimal value of k
- Return the cluster ids for each row of the training set as a list.
Useful Resources
- https://scikit-learn.org/stable/modules/generated/sklearn.cluster.KMeans.html#sklearn.cluster.KMeans
- https://www.scikit-yb.org/en/latest/api/cluster/elbow.html
INPUTS
- Use the needed instance variables you set in the __init__ method
- train_features – a dataset split by a function similar to tts which should be used in the training/fitting steps
OUTPUTS
a list of cluster ids that the K-means model has assigned for each row in the train dataset
Function Skeleton
def kmeans_train(self,train_features:pd.DataFrame) -> list:
cluster_ids = list()
return cluster_ids
KmeansClustering:kmeans_test
K-means clustering is a process of grouping together similar rows together and assigning them to a cluster. For this method you will use the training data to fit an optimal K-means cluster on the test data.
To help you get started, we have provided a list of subtasks to complete for this task:
- Use a model similar to the one you trained in the kmeans_train method to generate cluster ids for each row of the test dataset. You should either (1) reuse the same model from kmeans_train or (2) train a new model in the test method using the training data.
- Return the cluster ids for each row of the test set as a list.
Useful Resources
- https://scikit-learn.org/stable/modules/generated/sklearn.cluster.KMeans.html#sklearn.cluster.KMeans
- https://www.scikit-yb.org/en/latest/api/cluster/elbow.html
INPUTS
- Use the needed instance variables you set in the __init__ method
- test_features – a dataset split by a function similar to tts which should be used in the test steps
OUTPUTS
a list of cluster ids that the K-means model has assigned for each row in the test dataset
Function Skeleton
def kmeans_test(self,test_features:pd.DataFrame) -> list:
cluster_ids = list()
return cluster_ids
KmeansClustering:train_add_kmeans_cluster_id_feature, test_add_kmeans_cluster_id_feature
Using the two methods you completed above (kmeans_train and kmeans_test) you will add a new feature(column) to the training and test dataframes. This is similar to the feature engineering method in Task 2 where you appended new columns onto an existing dataframe.
To do this, use the output of the methods (the list of cluster ids you return) from the corresponding train or test method and add it as a new column named kmeans_cluster_id in the input dataframe, then return the full dataframe.
Useful Resources
INPUTS
Use the needed instance variables you set in the __init__ method and the kmeans_train and kmeans_test methods you wrote above to produce the needed output.
- train_features – a dataset split by a function similar to tts which should be used in the training/fitting steps
- test_features – a dataset split by a function similar to tts which should be used in the test steps
OUTPUTS
A pandas dataframe with the kmeans_cluster_id added as a feature and all other input columns unchanged, for each of the two methods train_add_kmeans_cluster_id_feature and test_add_kmeans_cluster_id_feature.
Function Skeleton
def train_add_kmeans_cluster_id_feature(self,train_features:pd.DataFrame) -> pd.DataFrame:
output_df = pd.DataFrame()
return output_df
def test_add_kmeans_cluster_id_feature(self,test_features:pd.DataFrame) -> pd.DataFrame:
output_df = pd.DataFrame()
return output_df
Task 4
Now let’s try a few supervised classification models:
- A naive model you’ll build yourself
- Logistic Regression
- Random Forest
- Gradient Boosting
We have chosen a few commonly used models for you to use here, but there are many options. In the real world, specific algorithms may fit a specific dataset better than other algorithms.
You won’t be doing any hyperparameter tuning yet, so you can better focus on writing the basic code. You will:
- Train a model using the training set.
- Predict on the training/test sets.
- Calculate performance metrics.
- Return a ModelMetrics object and trained scikit-learn model from each model function.
(Note on feature importance: You should use RFE for determining feature importance of your Logistic Regression model, but do NOT use RFE for your Random Forest or Gradient Boosting models to determine feature importance. Please use their built-in values for this.)
Useful Links:
- scikit-learn: machine learning in Python — scikit-learn 1.2.1 documentation
- Training and Test Sets – Machine Learning – Google Developers
- Bias–variance tradeoff – Wikipedia
- Overfitting – Wikipedia
- An Introduction to Classification in Machine Learning – builtin
- Classification in Machine Learning: An Introduction – DataCamp
Deliverables:
- Complete the functions and methods in task4.py
- For this task we have released a local test suite please set that up and use it to debug your function.
- Submit task4.py to Gradescope when you pass all local tests. Refer to the Submissions page for details.
Local Test Dataset Information
For this task the local test dataset we are using is the NATICUSdroid dataset, which contains 86 columns of data related to android permissions used by benign and malicious Android applications released between 2010 and 2019. For more information such as the introductory paper and the Citations/Acknowledgements you can view the dataset site in the UCI ML repository. If you look at the online poster for the paper that the dataset creators wrote from their research, they trained a variety of different models including Random Forest, Logistic Regression and XGBoost and calculated a variety of metrics related to training and detection performance. In this task we will guide you through training ML models and calculating performance metrics to compare the predictive abilities of different models.
Instructions:
The Task4.py File has function skeletons that you will complete with Python code (mostly using the pandas and scikit-learn libraries).
The goal of each of these functions is to give you familiarity with the applied concepts of training a model, using it to score records and calculating performance metrics for it. See information about the function inputs, outputs and skeletons below.
Table of contents
- ModelMetrics
- calculate_naive_metrics
- calculate_logistic_regression_metrics
- calculate_random_forest_metrics
- calculate_gradient_boosting_metrics
ModelMetrics
- In order to simplify the autograding we have created a class that will hold the metrics and feature importances for a model you trained.
- You should not modify this class but are expected to use it in your return statements.
- This means you put your training and test metrics dictionaries and feature importance DataFrames inside a ModelMetrics object for the autograder to handle. This is for each of the Logistic Regression, Gradient Boosting and Random Forest models you will create.
- You do not need to return a feature importance DataFrame in the ModelMetrics value for the naive model you will create, just return None in that position of the return statement, as the given code does.
calculate_naive_metrics
A Naive model is a very simple model/prediction that can help to frame how well a more sophisticated model is doing. At best, such a model has random competence at predicting things. At worst, it’s wrong all the time.
Since a naive model is incredibly basic (often a constant or randomly selected result), we can expect that any more sophisticated model that we train should outperform it. If the naive Model beats our trained model, it can mean that additional data (rows or columns) is needed in the dataset to improve our model. It can also mean that the dataset doesn’t have a strong enough signal for the target we want to predict.
In this function, you’ll implement a simple model that always predicts a constant (function-provided) number, regardless of the input values. Specifically, you’ll use a given constant integer, provided as the parameter naive_assumption, as the model’s prediction. This means the model will always output this constant value, without considering the actual data. Afterward, you will calculate four metrics—accuracy, recall, precision, and F1-score—for both the training and test datasets.
[1] Refer to the resources below.
Useful Resources
- https://machinelearningmastery.com/how-to-develop-and-evaluate-naive-classifier-strategies-using-probability/
- https://scikit-learn.org/stable/modules/generated/sklearn.metrics.accuracy_score.html#sklearn.metrics.accuracy_score
- https://scikit-learn.org/stable/modules/generated/sklearn.metrics.recall_score.html#sklearn.metrics.recall_score
- https://scikit-learn.org/stable/modules/generated/sklearn.metrics.precision_score.html#sklearn.metrics.precision_score
- https://scikit-learn.org/stable/modules/generated/sklearn.metrics.f1_score.html#sklearn.metrics.f1_score
INPUTS
- train_features – a dataset split by a function similar to the tts function you created in task2
- test_features – a dataset split by a function similar to the tts function you created in task2
- train_targets – a dataset split by a function similar to the tts function you created in task2
- test_targets – a dataset split by a function similar to the tts function you created in task2
- naive_assumption – an integer that should be used as the result from the naive model you will create
OUTPUTS
A completed ModelMetrics object with a training and test metrics dictionary with each one of the metrics rounded to 4 decimal places
Function Skeleton
def calculate_naive_metrics(train_features:pd.DataFrame, test_features:pd.DataFrame, train_targets:pd.Series, test_targets:pd.Series, naive_assumption:int) -> ModelMetrics:
train_metrics = {
“accuracy” : 0,
“recall” : 0,
“precision” : 0,
“fscore” : 0
}
test_metrics = {
“accuracy” : 0,
“recall” : 0,
“precision” : 0,
“fscore” : 0
}
naive_metrics = ModelMetrics(“Naive”,train_metrics,test_metrics,None)
return naive_metrics
calculate_logistic_regression_metrics
A logistic regression model is a simple and more explainable statistical model that can be used to estimate the probability of an event (log-odds). At a high level, a logistic regression model uses data in the training set to estimate a column’s weight in a linear approximation function. Conceptually this is similar to estimating m for each column in the line formula you probably know well from geometry: y = m*x + b. If you are interested in learning more, you can read up on the math behind how this works. For this project, we are more focused on showing you how to apply these models, so you can simply use a scikit-learn Logistic Regression model in your code.
For this task use scikit-learn’s LogisticRegression class and complete the following subtasks:
- Train a Logistic Regression model (initialized using the kwargs passed into the function)
- Predict scores for training and test datasets and calculate the 7 metrics listed below for the training and test datasets using predictions from the fit model. (All rounded to 4 decimal places)
- accuracy
- recall
- precision
- fscore
- false positive rate (fpr)
- false negative rate (fnr)
- Area Under the Curve of Receiver Operating Characteristics Curve (roc_auc)
- Use RFE to select the top 10 features
- Train a Logistic Regression model using these selected features (initialized using the kwargs passed into the function)
- Create a Feature Importance DataFrame from the model trained on the top 10 features:
- Use the top 10 features sort by absolute value of the coefficient from biggest to smallest.
- Make sure you use the same feature and importance column names as set in ModelMetrics in feat_name_col [Feature] and imp_col [Importance].
- Round the importances to 4 decimal places (do this step after you have sorted by Importance)
- Reset the index to 0-9. You can do this the same way you did in task1.
NOTE: Make sure you use the predicted probabilities for roc auc
Useful Resources
- https://stats.libretexts.org/Bookshelves/Introductory_Statistics/OpenIntro_Statistics_(Diez_et_al)./08%3A_Multiple_and_Logistic_Regression/8.04%3A_Introduction_to_Logistic_Regression
- https://scikit-learn.org/stable/modules/generated/sklearn.linear_model.LogisticRegression.html#sklearn.linear_model.LogisticRegression
- https://scikit-learn.org/stable/modules/generated/sklearn.metrics.accuracy_score.html#sklearn.metrics.accuracy_score
- https://scikit-learn.org/stable/modules/generated/sklearn.metrics.recall_score.html#sklearn.metrics.recall_score
- https://scikit-learn.org/stable/modules/generated/sklearn.metrics.precision_score.html#sklearn.metrics.precision_score
- https://scikit-learn.org/stable/modules/generated/sklearn.metrics.f1_score.html#sklearn.metrics.f1_score
- https://en.wikipedia.org/wiki/Confusion_matrix
- https://scikit-learn.org/stable/modules/generated/sklearn.metrics.roc_auc_score.html
INPUTS
The first 4 are similar to the tts function you created in Task 2:
- train_features – a Pandas Dataframe with training features
- test_features – a Pandas Dataframe with test features
- train_targets – a Pandas Dataframe with training targets
- test_targets – a Pandas Dataframe with test targets
- logreg_kwargs – a dictionary with keyword arguments that can be passed directly to the scikit-learn Logistic Regression class
OUTPUTS
- A completed ModelMetrics object with a training and test metrics dictionary with each one of the metrics rounded to 4 decimal places
- A scikit-learn Logistic Regression model object fit on the training set
Function Skeleton
def calculate_logistic_regression_metrics(train_features:pd.DataFrame, test_features:pd.DataFrame, train_targets:pd.Series, test_targets:pd.Series, logreg_kwargs) -> tuple[ModelMetrics,LogisticRegression]:
model = LogisticRegression()
train_metrics = {
“accuracy” : 0,
“recall” : 0,
“precision” : 0,
“fscore” : 0,
“fpr” : 0,
“fnr” : 0,
“roc_auc” : 0
}
test_metrics = {
“accuracy” : 0,
“recall” : 0,
“precision” : 0,
“fscore” : 0,
“fpr” : 0,
“fnr” : 0,
“roc_auc” : 0
}
log_reg_importance = pd.DataFrame()
log_reg_metrics = ModelMetrics(“Logistic Regression”,train_metrics,test_metrics,log_reg_importance)
return log_reg_metrics,model
Example of Feature Importance DataFrame
| Feature | Importance | |
| 0 | android.permission.REQUEST_INSTALL_PACKAGES | -5.5969 |
| 1 | android.permission.READ_PHONE_STATE | 5.1587 |
| 2 | android.permission.android.permission.READ_PHONE_STATE | -4.7923 |
| 3 | com.anddoes.launcher.permission.UPDATE_COUNT | -4.7506 |
| 4 | com.samsung.android.providers.context.permission.WRITE_USE_APP_FEATURE_SURVEY | -4.4933 |
| 5 | com.google.android.finsky.permission.BIND_GET_INSTALL_REFERRER_SERVICE | -4.4831 |
| 6 | com.google.android.c2dm.permission.RECEIVE | -4.2781 |
| 7 | android.permission.FOREGROUND_SERVICE | -4.1966 |
| 8 | android.permission.USE_FINGERPRINT | -3.9239 |
| 9 | android.permission.INTERNET | -2.7991 |
calculate_random_forest_metrics
A Random Forest model is a more complex model than the naive and Logistic Regression Models you have trained so far. It can still be used to estimate the probability of an event, but achieves this using a different underlying structure: a tree-based model.
Conceptually, this looks a lot like many if/else statements chained together into a “tree”. A Random Forest expands on this and trains different trees with different subsets of the data and starting conditions. It does this to get a better estimate than a single tree would give. For this project, we are more focused on showing you how to apply these models, so you can simply use the scikit-learn Random Forest model in your code.
For this task use scikit-learn’s Random Forest Classifier class and complete the following subtasks:
- Train a Random Forest model (initialized using the kwargs passed into the function)
- Predict scores for training and test datasets and calculate the 7 metrics listed below for the training and test datasets using predictions from the fit model. (All rounded to 4 decimal places)
- accuracy
- recall
- precision
- fscore
- false positive rate (fpr)
- false negative rate (fnr)
- Area Under the Curve of Receiver Operating Characteristics Curve (roc_auc)
- Create a Feature Importance DataFrame from the trained model:
- Do Not Use RFE for feature selection
- Use the top 10 features selected by the built in method (sorted from biggest to smallest)
- Make sure you use the same feature and importance column names as ModelMetrics shows in feat_name_col [Feature] and imp_col [Importance]
- Round the importances to 4 decimal places (do this step after you have sorted by Importance)
- Reset the index to 0-9 you can do this the same way you did in task1
NOTE: Make sure you use the predicted probabilities for roc auc
Useful Resources
- https://blog.dataiku.com/tree-based-models-how-they-work-in-plain-english
- https://scikit-learn.org/stable/modules/generated/sklearn.ensemble.RandomForestClassifier.html
- https://scikit-learn.org/stable/modules/generated/sklearn.metrics.accuracy_score.html#sklearn.metrics.accuracy_score
- https://scikit-learn.org/stable/modules/generated/sklearn.metrics.recall_score.html#sklearn.metrics.recall_score
- https://scikit-learn.org/stable/modules/generated/sklearn.metrics.precision_score.html#sklearn.metrics.precision_score
- https://scikit-learn.org/stable/modules/generated/sklearn.metrics.f1_score.html#sklearn.metrics.f1_score
- https://en.wikipedia.org/wiki/Confusion_matrix
- https://scikit-learn.org/stable/modules/generated/sklearn.metrics.roc_auc_score.html
INPUTS
- train_features – a dataset split by a function similar to the tts function you created in task2
- test_features – a dataset split by a function similar to the tts function you created in task2
- train_targets – a dataset split by a function similar to the tts function you created in task2
- test_targets – a dataset split by a function similar to the tts function you created in task2
- rf_kwargs – a dictionary with keyword arguments that can be passed directly to the scikit-learn RandomForestClassifier class
OUTPUTS
- A completed ModelMetrics object with a training and test metrics dictionary with each one of the metrics rounded to 4 decimal places
- An scikit-learn Random Forest model object fit on the training set
Function Skeleton
def calculate_random_forest_metrics(train_features:pd.DataFrame, test_features:pd.DataFrame, train_targets:pd.Series, test_targets:pd.Series, rf_kwargs) -> tuple[ModelMetrics,RandomForestClassifier]:
model = RandomForestClassifier()
train_metrics = {
“accuracy” : 0,
“recall” : 0,
“precision” : 0,
“fscore” : 0,
“fpr” : 0,
“fnr” : 0,
“roc_auc” : 0
}
test_metrics = {
“accuracy” : 0,
“recall” : 0,
“precision” : 0,
“fscore” : 0,
“fpr” : 0,
“fnr” : 0,
“roc_auc” : 0
}
rf_importance = pd.DataFrame()
rf_metrics = ModelMetrics(“Random Forest”,train_metrics,test_metrics,rf_importance)
return rf_metrics,model
Example of Feature Importance DataFrame
| Feature | Importance | |
| 0 | android.permission.READ_PHONE_STATE | 0.1871 |
| 1 | com.google.android.c2dm.permission.RECEIVE | 0.1165 |
| 2 | android.permission.RECEIVE_BOOT_COMPLETED | 0.1036 |
| 3 | com.android.launcher.permission.INSTALL_SHORTCUT | 0.1004 |
| 4 | android.permission.ACCESS_COARSE_LOCATION | 0.0921 |
| 5 | android.permission.ACCESS_FINE_LOCATION | 0.0531 |
| 6 | android.permission.GET_TASKS | 0.0462 |
| 7 | android.permission.SYSTEM_ALERT_WINDOW | 0.0433 |
| 8 | com.android.vending.BILLING | 0.026 |
| 9 | android.permission.WRITE_SETTINGS | 0.0236 |
calculate_gradient_boosting_metrics
A Gradient Boosted model is more complex than the Naive and Logistic Regression models and similar in structure to the Random Forest model you just trained. A Gradient Boosted model expands on the tree-based model by using its additional trees to predict the errors from the previous tree. For this project, we are more focused on showing you how to apply these models, so you can simply use the scikit-learn Gradient Boosted Model in your code.
For this task use scikit-learn’s Gradient Boosting Classifier class and complete the following subtasks:
- Train a Gradient Boosted model (initialized using the kwargs passed into the function)
- Predict scores for training and test datasets and calculate the 7 metrics listed below for the training and test datasets using predictions from the fit model. (All rounded to 4 decimal places)
- accuracy
- recall
- precision
- fscore
- false positive rate (fpr)
- false negative rate (fnr)
- Area Under the Curve of Receiver Operating Characteristics Curve (roc_auc)
- Create a Feature Importance DataFrame from the trained model:
- Do Not Use RFE for feature selection
- Use the top 10 features selected by the built in method (sorted from biggest to smallest)
- Make sure you use the same feature and importance column names as ModelMetrics shows in feat_name_col [Feature] and imp_col [Importance]
- round the importances to 4 decimal places (do this step after you have sorted by Importance)
- Reset the index to 0-9 you can do this the same way you did in task1
NOTE: Make sure you use the predicted probabilities for roc auc
Refer to the Submissions page for details about submitting your work.
Useful Resources
- https://blog.dataiku.com/tree-based-models-how-they-work-in-plain-english
- https://scikit-learn.org/stable/modules/generated/sklearn.ensemble.GradientBoostingClassifier.html
- https://scikit-learn.org/stable/modules/generated/sklearn.metrics.accuracy_score.html#sklearn.metrics.accuracy_score
- https://scikit-learn.org/stable/modules/generated/sklearn.metrics.recall_score.html#sklearn.metrics.recall_score
- https://scikit-learn.org/stable/modules/generated/sklearn.metrics.precision_score.html#sklearn.metrics.precision_score
- https://scikit-learn.org/stable/modules/generated/sklearn.metrics.f1_score.html#sklearn.metrics.f1_score
- https://en.wikipedia.org/wiki/Confusion_matrix
- https://scikit-learn.org/stable/modules/generated/sklearn.metrics.roc_auc_score.html
INPUTS
- train_features – a dataset split by a function similar to the tts function you created in task2
- test_features – a dataset split by a function similar to the tts function you created in task2
- train_targets – a dataset split by a function similar to the tts function you created in task2
- test_targets – a dataset split by a function similar to the tts function you created in task2
- gb_kwargs – a dictionary with keyword arguments that can be passed directly to the scikit-learn GradientBoostingClassifier class
OUTPUTS
- A completed ModelMetrics object with a training and test metrics dictionary with each one of the metrics rounded to 4 decimal places
- An scikit-learn Gradient Boosted model object fit on the training set
Function Skeleton
def calculate_gradient_boosting_metrics(train_features:pd.DataFrame, test_features:pd.DataFrame, train_targets:pd.Series, test_targets:pd.Series, gb_kwargs) -> tuple[ModelMetrics,GradientBoostingClassifier]:
model = GradientBoostingClassifier()
train_metrics = {
“accuracy” : 0,
“recall” : 0,
“precision” : 0,
“fscore” : 0,
“fpr” : 0,
“fnr” : 0,
“roc_auc” : 0
}
test_metrics = {
“accuracy” : 0,
“recall” : 0,
“precision” : 0,
“fscore” : 0,
“fpr” : 0,
“fnr” : 0,
“roc_auc” : 0
}
gb_importance = pd.DataFrame()
gb_metrics = ModelMetrics(“Gradient Boosting”,train_metrics,test_metrics,gb_importance)
return gb_metrics,model
Example of Feature Importance DataFrame
| Feature | Importance | |
| 0 | android.permission.READ_PHONE_STATE | 0.6046 |
| 1 | com.google.android.c2dm.permission.RECEIVE | 0.1994 |
| 2 | android.permission.RECEIVE_BOOT_COMPLETED | 0.0354 |
| 3 | android.permission.INTERNET | 0.0279 |
| 4 | android.permission.SEND_SMS | 0.0167 |
| 5 | com.android.launcher.permission.INSTALL_SHORTCUT | 0.0165 |
| 6 | android.permission.READ_EXTERNAL_STORAGE | 0.0115 |
| 7 | android.permission.RECEIVE_USER_PRESENT | 0.0109 |
| 8 | android.permission.ACCESS_FINE_LOCATION | 0.0095 |
| 9 | android.permission.KILL_BACKGROUND_PROCESSES | 0.0092 |
|
|
Task 5: Model Training and Evaluation:
Now that you have written functions for different steps of the model-building process, you will put it all together. You will write code that trains a model with hyperparameters you determine (you should do any tuning locally or in a notebook, i.e., don’t tune your model in gradescope since the autograder will likely timeout).
- Refer to the Submissions page for details about submitting your work.
Important: Conduct hyperparameter tuning locally or in a separate notebook. Avoid tuning within Gradescope to prevent autograder timeouts.
Develop your own local tests to ensure your code functions correctly before submitting to Gradescope. Do not share these tests with other students.
train_model_return_scores (ClaMP Dataset)
Instructions (10 points):
This function focuses on training a model using the ClaMP dataset and evaluating its performance on a test set.
- Input:
- train_df: A Pandas DataFrame containing the ClaMP training data. This includes the “class” column, which serves as your target variable (0 for benign, 1 for malicious).
- test_df: A Pandas DataFrame containing the ClaMP test data. The “class” column is intentionally omitted from this set.
- Model Training:
- Train a machine learning model using the train_df dataset.
- You may use any techniques covered in this project.
- Set a random seed for reproducibility.
- Perform hyperparameter tuning to optimize your model’s performance
- Tip: putting comments on the ranges you select for hyperparameters will help the graders understand how you chose it
- Prediction:
- Use your trained model to predict the probability of malware for each row in the test_df.
- Output these probabilities as values between 0 and 1. A value closer to 0 indicates a lower likelihood of malware, while a value closer to 1 indicates a higher likelihood.
- Output:
- Return a Pandas DataFrame with two columns:
- index: The index from the input test_df.
- malware_score: The predicted malware probabilities.
- Return a Pandas DataFrame with two columns:
- Evaluation:
- The autograder will evaluate your predictions using the ROC AUC score.
- You must achieve a ROC AUC score of 0.9 or higher on the test set to receive full credit.
Sample Submission (ClaMP):
| index | malware_score |
| 0 | 0.65 |
| 1 | 0.1 |
| … | … |
Function Skeleton (ClaMP):
import pandas as pd
def train_model_return_scores(train_df, test_df) -> pd.DataFrame:
“””
Trains a model on the ClaMP training data and returns predicted probabilities
for the test data.
Args:
train_df (pd.DataFrame): ClaMP training data with ‘class’ column.
test_df (pd.DataFrame): ClaMP test data without ‘class’ column.
Returns:
pd.DataFrame: DataFrame with ‘index’ and ‘malware_score’ columns.
“””
# TODO: Implement the model training and prediction logic as described above.
test_scores = pd.DataFrame() # Replace with your implementation
return test_scores
train_model_unsw_return_scores (UNSW-NB15 Dataset)
Instructions (10 points):
This function is similar to the previous one but uses the UNSW-NB15 dataset.
- Input:
- train_df: A Pandas DataFrame containing the UNSW-NB15 training data (including the “class” column).
- test_df: A Pandas DataFrame containing the UNSW-NB15 test data (without the “class” column).
- Model Training:
- Train a machine learning model using the train_df.
- You can use any techniques from this project.
- Set a random seed for reproducibility.
- Prediction:
- Predict the probability of class=1 for each row in test_df.
- Output probabilities between 0 and 1, where values closer to 1 indicate a higher likelihood of being class=1.
- Output:
- Return a Pandas DataFrame with two columns:
- index: The index from the input test_df.
- prob_class_1: The predicted probabilities of class=1.
- Return a Pandas DataFrame with two columns:
- Evaluation:
- The autograder will evaluate your predictions using the ROC AUC score.
- Full Credit (10 points) will be given for 0.76 and above, 5 points for .75 and above and 2.5 points for .55 and above
- Parameter tuning will likely be necessary to achieve higher scores.
Sample Submission (UNSW-NB15):
| index | prob_class_1 |
| 0 | 0.65 |
| 1 | 0.1 |
| … | … |
Function Skeleton (UNSW-NB15):
import pandas as pd
def train_model_unsw_return_scores(train_df, test_df) -> pd.DataFrame:
“””
Trains a model on the UNSW-NB15 training data and returns predicted
probabilities for the test data.
Args:
train_df (pd.DataFrame): UNSW-NB15 training data with ‘class’ column.
test_df (pd.DataFrame): UNSW-NB15 test data without ‘class’ column.
Returns:
pd.DataFrame: DataFrame with ‘index’ and ‘prob_class_1’ columns.
“””
# TODO: Implement the model training and prediction logic as described above.
test_scores = pd.DataFrame() # Replace with your implementation
return test_scores
Deliverables
- Local Testing: We strongly encourage you to thoroughly test your code locally using the provided datasets. Create your own test sets by splitting the training data.
- Gradescope Submission: Once you are confident in your solution, submit your task5.py file (containing both functions) to Gradescope.
Dataset Information
ClaMP Dataset
- The ClaMP (Classification of Malware with PE Headers) dataset is used for malware classification.
- It is based on the header fields of Portable Executable (PE) files.
- Learn more about PE files:
- ClaMP Dataset GitHub Repository: https://github.com/urwithajit9/ClaMP
- This project uses the ClaMP_Raw-5184.csv file (55 features).
UNSW-NB15 Dataset
- The UNSW-NB15 dataset was created using the IXIA PerfectStorm tool to simulate real-world network traffic and attack scenarios.
- Dataset Website: https://research.unsw.edu.au/projects/unsw-nb15-dataset
- Dataset Description
- Feature Descriptions
- Note: This project does not use all features or classes from the original UNSW-NB15 dataset.